So, how many blog posts begin with the title "random thoughts?" Probably more than I would like to imagine.
So, I was thinking. I have never worn a pair of cargo pants. Except for the back pockets of denim blue jeans, I own no pants that have pockets sewn on to the outside. Tomorrow I will be at an event where college students are asked to dress up. No doubt, there will be about 5-7 cargo pants in the group of 30+ guys. Shirt, tie, big weird shoes, and cargo pants. I don't think I will be getting a pair of cargo pants any time soon.
I am teaching guitar to a woman who has to drive 20 miles to this rinky-dink town. Luckily, she will do her grocery shopping after the lesson, so it groups her errands. I am surprised that there are so few guitar teachers, and players for that matter, in this part of the Midwest. I swear, in Virginia you couldn't swing a dead cat without hitting a guy offering guitar lessons.
I have to go to Jefferson City this week. I don't mind the drive, but I get tired of hotel life - I would have been a bad salesman. This trip is only once every 2 months, and for one night! I remember staying in a hotel room with my father about 4-5 years ago. He tried to watch porn. Yup, you read that right. I had to tell him that sitting in a hotel room watching porn was not something that two straight guys do. Daddy.
--gh
Sunday, September 24, 2006
Friday, September 22, 2006
Last Weekend, Homeland Security, Moulage, Kansas City...
I left before things got hinky. I do not care for physical performance, it makes me feel awkward. This includes actors, clowns, circuses, rodeos. They make me feel really wrong. Add photographers to that, and street performers, and you have the septa-fecta, or whatever that would be. Surely I am freaked out by more than this. So, I left and prepared to go to an air show.
--gh
HNB 4.2 Ripped Potential
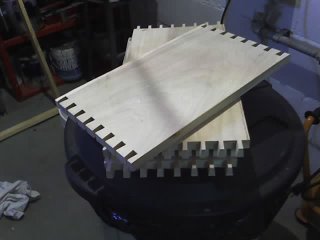 I just love how the cabinet starts out as a board with so much potential. Remember that this is some 1x12 popular. I like to put dovetails on the whole width, and then rip it to the proper dimension later. This is because I don't think I could rip it and then make dovetails that would line up very well. I mark a front and back on the cabinet as a huge 12-inch deep box first. Then I disassemble it for ripping.
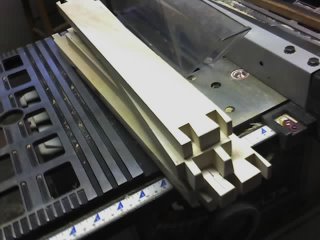 I really have to get a new table saw some day. Fairly has been talking up better table saws and has got me thinking. I did not do such a good job of ripping these pieces. Part of it is the table's fault, and of course some of it is mine. Well, I guess I would like it to be all my fault, with no tooling errors working against me. No worries, though, I can sand most of what does not line up anyway.
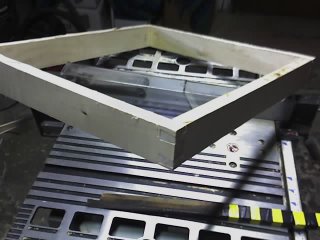 Here is a benefit of routing the dovetails and then ripping. You end up with cool looking left-overs! I have some of these from my first amp, in pine. I think I would like to route a slot near the bottom inside and put some 1/4" plywood in to make a tray. Not sure what I would put in it, but it might be good for something. If you can think of something better to do with it, please comment.
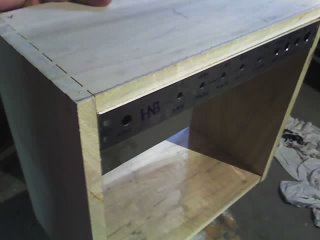 Now it is starting to look more like a combo amp! The chassis is really held in there by my hand, you can barely make out my thumb at the top of the photo. Luckily, I have enough wiggle room for some paint on the chassis, and finish on the cabinet. It is going to be so tight that it will look like I planned it that way. Yeah, that's right, I think I planned a tolerance of 1/100th inch!
--gh
Tuesday, September 19, 2006
HNB 4.1 dovetails!
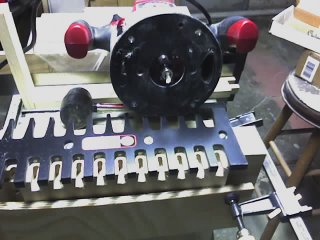 I'm a cheater, here is my router and dovetail joint jig (KELLER). Someone once suggested getting a dovetail saw just to overcut some of the cuts to make it look home-made. Well, that would be a little excessive. I am using my table saw as a work table. I think I know why some people say that they would like a real workshop when they build a house. However, I can't complain, I really can't.
 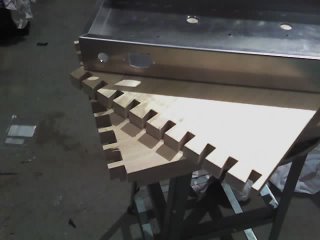 Here are the top and sides, routed for the dovetail joints. This only takes about 10-15 minutes, so it is really convenient. The joints are tight enough that I will not use any screws, or corner bracing. It frightens me a little when I put the edges together. I am always afraid I will break one of the pins.
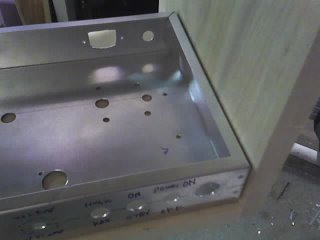 I was a little concerned about this. I cut the width of the cabinet so that I only had about 1/20th of an inch wiggle room for the chassis. Kind of a dopey thing to do, but with careful measurement and routing, this thing will fit extremely well. Add a little paint on both sides of the chassis, and some finish on the cabinet, and it will be a tight fit. The kind of tight that looks good, I hope.
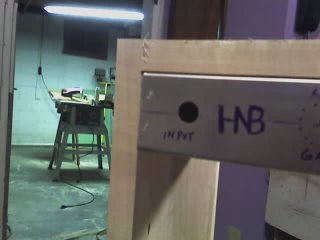 The cabinet has not been ripped yet, so you are not looking at the real edge. Still, this gives you a feeling for what the final product might look like. Remember that this project will mount the chassis upside down in the cabinet. The tubes and stuff will hang down. Come to think of it, I need to make sure that the transformers and tubes do not get in the way of the speaker. This is why some combo amps have the speaker off center. Not that it would be too noticeable, with the grille cloth and all.
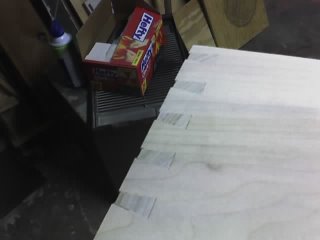 Here's a little preview of what things will look like some day. If it seems like the pins are a little long, that is because they will be sanded down. Once this thing is done, I will glue it up and then sand everything to make it nice and tidy. I like working with wood. I really, really, really like it.
The next step is to fit a shelf that the chassis will sit on. This is also how I will fasten the chassis, rather than screws poking up through the top. After that, I will route a channel to contain the speaker baffle. This hunk of 1/2" plywood that will hold the speaker is another reason why I can hold the thing together with glue only. I'll show you later.
--gh
Thursday, September 14, 2006
Screw Mexican Sovereignty
News flash, Dog the Bounty Hunter (Duane Chapman) was arrested today. I remember when that serial rapist was tracked down in Mexico (heir of Max Factor enterprise), but I had not remembered that it was Dog the Bounty Hunter who tracked down and brought this guy in. Stupid Mexican government, bounty hunting is illegal there.
I can't believe the United States would even consider extradition this guy. He's cool! The Mexican government does not care about U.S. laws, so I think the U.S. Marshals should just let this one go.
They should claim they lost him, and then snicker every time he airs his'elf on his show each week.
--gh
Tuesday, September 12, 2006
HNB 4 ...some wood
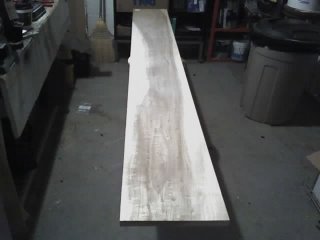 I was at the hardware store the other day picking up the wood for the cabinet. I can't remember why, but I wanted to have the cabinet assembled before finishing the chassis and painting it. Maybe I will remember why. Anyhow, I was set on pine again, but this is a gift. So, I spent twice as much and bought a length of poplar. Here you can see a bit of my workshop in the basement. It's nice to not have to do this type of stuff in the garage. It's still a bit chilly in the winter, though. My workroom is a small room that was formerly storage space for coal. I even have a coal door which is nice for bringing long things in and out of there. Yeah, coal... my house is old.
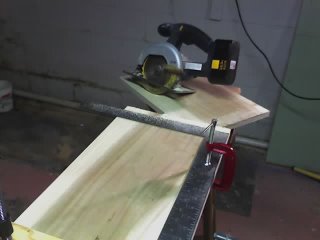 The poplar is 1x12, even though it will end up a little over 9 inches wide. I will rip these after I cut the dovetails. Right now I can't make the dovetail joint work by measuring first. The edges are off anywhere from a 1/16th to 1/8th inch. So, I will route the dovetail, mark the real edge, and then rip the final piece. This will leave a box shape 2-3 inches deep that has dovetail joints - I won't discard them. I think I will make some trays or something out of them. This is hard to describe without a picture. This room is right next to my workroom. It is just empty space in the basement next to the water heater and furnace. Our basement isn't filled with books or boxes or whatever. We are not packrats.
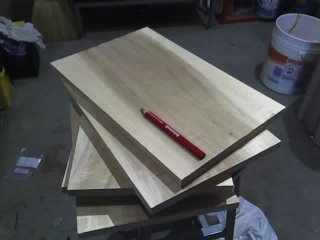 There is something very satisfying about having this project come from one single 8-foot board. Only 11 inches was left, which is why I went up in quality for the wood. Since it was only one board, it wasn't going to break the bank. I don't even know what poplar looks like as a finished product, maybe I should look into that and stuff. This is really going to be a step up from my first project. I am going to take this slow and do it right.
I even got some grille cloth for the speaker this time. There are several ways to do that, and I haven't made my mind up. I think I will permanently mount the speaker baffle to make the cabinet stiffer and stronger. I plan to use no fasteners whatsoever on the main cabinet. It will be glue only, and of course the dovetails. Integrating the speaker baffle will make it that much stronger, as well as the shelf for the cabinet. Once glued together, this will take a sledgehammer to take apart again.
--gh
Saturday, September 09, 2006
HNB 3.1 Drilling 95% done
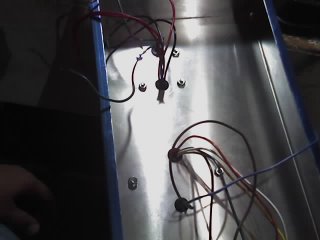 I mounted the transformers and ran the primaries and secondaries through the chassis to check for fit. This gave me the opportunity to measure where the turret board will sit. I am varying the layout a little from the design I downloaded. I guess it makes it a little more mine. My first project had the parts ordered from one place and the chassis drilled and punched. I had no idea how big a part this actually was! It might surprise you that I had to order stuff from three different sources.
 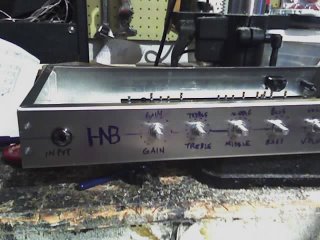 Heh, it didn't take long before I peeled off the plastic stuff that protects the chassis. I am going to sand it before I prime and paint it - so there isn't much to protect. After drilling almost all of the holes, I mounted some hardware to check for fit. This gave me an opportunity to see how much room I have for designing the faceplate. You might have guessed that the "name" of this amp is 'HNB.' This is the initials of my father-in-law, and this is the whacky way he writes it sometimes. I will get too creative with his faceplate, because it is a family gift. It would not be appropriate to have my taint all over it.
Well, I call it a faceplate, but actually I will draw right on the chassis. This is kind of a fun part of the project, I look forward to working on that in a few days. There isn't any step that I haven't enjoyed, it is all fun to me. Kind of a relaxing hobby. Something tells me that I will have this thing done by Christmas!
--gh
HNB 3.0 Drilling the Chassis
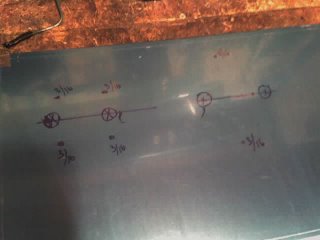 The headphone trick helped determine where to place the power and output transformer. Marking the mounting holes, it is time to drill. The small (3/16") holes are for mounting the transformers. The larger holes will be used to feed the primary and secondary wires through the chassis. I forgot to order grommets with my order - but this is something that should be found at the hardware store. I like the harware selection at Woodruff-Arnold, which is also where I buy the nuts, bolts, and various parts that make everything fasten together. A guy came to ask if I needed help, and I asked him if they carried rubber grommets. He didn't even think about it, he just said "no." About 30 seconds later, I was standing in the electrical hardware aisle right in front of a drawer that said "Grommets - Rubber." People.
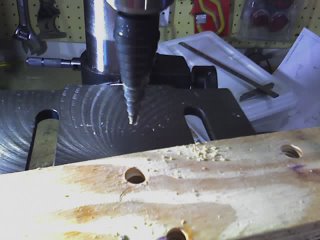 Drilling stuff like this screams for a stepper bit. Irwin sells one called "Unibit," but I ended up buying one from Greenlee. Actually, it came from Lowes. This one drills very neat holes from 3/16" to 7/8" in 1/16" steps. When drilling metal, be sure to clamp it down! For the big holes (like for the vacuum tubes), I spray WD-40 to keep the bit and the metal cool.
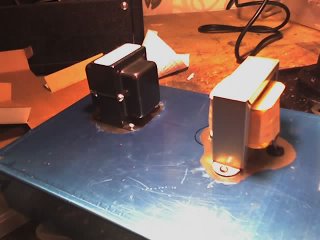 In case you are curious, the chassis is made of aluminum. This makes drilling very easy. The chassis will be mounted upside down, and if I was dealing with a larger amp aluminum might not work so well. The higher the output, the larger the transformers. The cooling black transformer is the power tranny. The ugly-ish one in the middle is the output transformer. They are both from Hammond.
--gh
Wednesday, September 06, 2006
HNB 2.1 The Headphone Trick
You can read about the "headphone trick" here. Basically, I need to orient the power and output transformers to minimize a sympathetic 60-cycle hum. What happens is that the wildly swinging wall voltage is creating magnetic havoc in the PT. This can be sensed in the OT, even though it it is not plugged in. It seems kind of scary, but you have to wire up a power cord to the primaries on the PT, and then hook up some headphones to the secondary of the OT. Then screw around with the locations of the two transformers until you don't hear the disturbing hum.
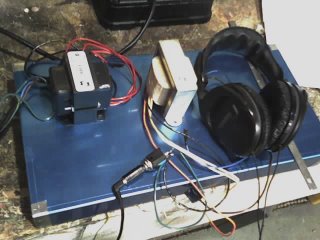
If this is not taken care of at this stage, then the small hum will never be removed from the amp. This is a magnet thing, and unless I wanted to get into mu-shielding, I would be stuck. Oddly enough, the hum was smallest when they were aligned parallel to each other. Every thing I read says to try it perpendicular. Well, that hummed!
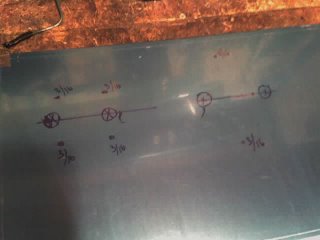
Now the chassis is marked for drilling the mounting holes and the holes for the primaries and secondaries of each transformer. I might have gotten excited and drilled these holes. However, I just realized that I did not have the rubber grommets that protect the wires from the chassis. I didn't want to cut 1/2" holes, and then realize I couldn't find grommets that fit this! Luckily, our hardware stores carry these.
--gh

If this is not taken care of at this stage, then the small hum will never be removed from the amp. This is a magnet thing, and unless I wanted to get into mu-shielding, I would be stuck. Oddly enough, the hum was smallest when they were aligned parallel to each other. Every thing I read says to try it perpendicular. Well, that hummed!

Now the chassis is marked for drilling the mounting holes and the holes for the primaries and secondaries of each transformer. I might have gotten excited and drilled these holes. However, I just realized that I did not have the rubber grommets that protect the wires from the chassis. I didn't want to cut 1/2" holes, and then realize I couldn't find grommets that fit this! Luckily, our hardware stores carry these.
--gh
Every time a balloon pops, a clown dies.
Tuesday, September 05, 2006
HNB 2.0 Sketching the cabinet
Thanks to M for telling me about Google Sketchup. I didn't think I would use it at all, then I remembered I liked to sketch out amps before building them. (I also like to talk in absolutes about something that I have only limited experience in, like building my very second amplifier!)
Okay, so, I found a use for SketchUp!
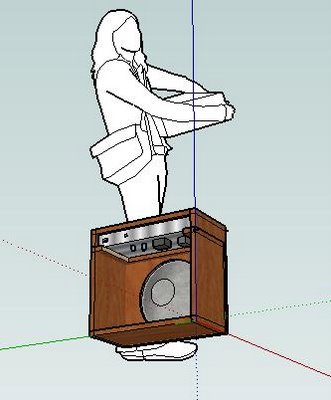
Here you can see that I have not finished it yet, and the chassis is not loaded in the cabinet.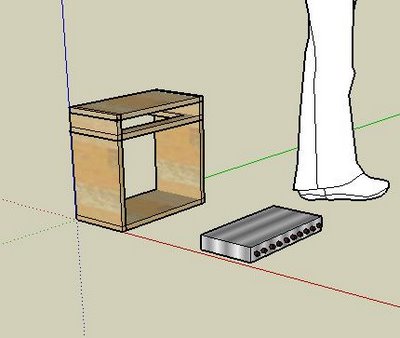
I even went through the hassle of adding some components to the underside of the chassis. You know, because that is important and stuff. Well, actually, I think I want to build in these rails to support the chassis, so this will show me to push the transformer in a bit for room.
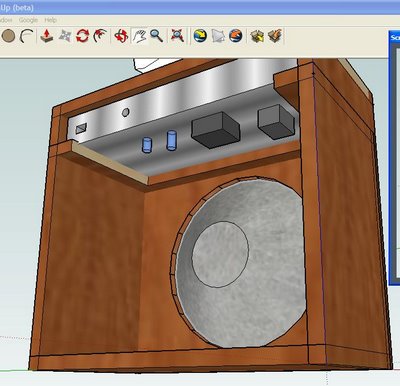
Okay, time to stop screwing around and to get back to building this thing!
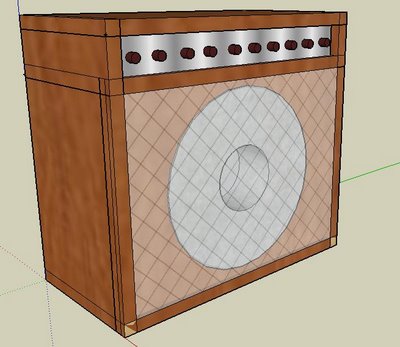
Okay, so, I found a use for SketchUp!

Here you can see that I have not finished it yet, and the chassis is not loaded in the cabinet.

I even went through the hassle of adding some components to the underside of the chassis. You know, because that is important and stuff. Well, actually, I think I want to build in these rails to support the chassis, so this will show me to push the transformer in a bit for room.

Okay, time to stop screwing around and to get back to building this thing!

Sunday, September 03, 2006
HNB 1.0 Parts gathered, start drilling stuff!
I have the pleasure of building another guitar amplifier. This will be based on the P1 project at the AX84.com website/community. This is exactly what I built last spring, but I am sourcing all the parts and get to drill the chassis and turret board myself this time. That's right, I got myself a drill press!
This amp will be a 1x10 combo for my father-in-law this Christmas. I sure hope he does not read my blog. For his 75th birthday, last month, his family gave him an electric guitar. Right now he is playing through a solid state practice amp - so this would be a vast improvement (5 watts of tube sounds plenty loud). The title of this post are his initials, and I will put that on the faceplate, among other things.
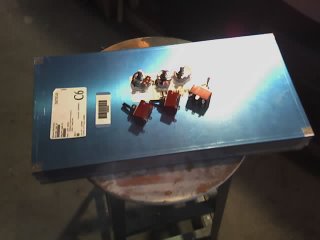 Here is the chassis and a few switchs and pots. Drilling the chassis is definitely what I am most nervous about. Then again, if I really screw it up, $20 gets me another one. The dimensions of this is 16x8x2 inches. When I do drill it, I will have to remember that it will be the reverse of my last effort, since a typical combo amp mounts the chassis upside down.
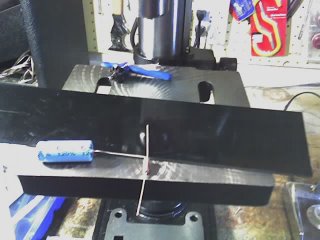 This is my drill press, a typical bench top 10" model that goes for $100. In front is the electrical grade fiberglass that will serve as the turret board. Many of the passive electrical components will mount on this board. Here is a capacitor and resistor as well.
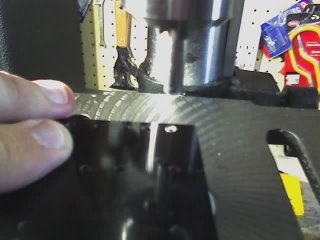 In the foreground you can see my turret staking set up. I am using the drill press to flare the turret ends on the board. This is done by pressure only, you don't actually turn the drill on for this. After drilling a bunch of holes in the turret board with a #33 drill bit, it is ready for the Keystone 1509-4 double turrets. In the mid-ground, you can see the turret board with one turret loaded. Apparently people mess this up often by doing the whole thing upside down. I must have checked and re-checked 20 times. The turret staking tool cost $11 which is kind of a ripoff. I built the holder with the set screw in it, someone online wanted $25 for that. I built it out of parts I had laying around, and if I did have to buy them they would cost about 35 cents.
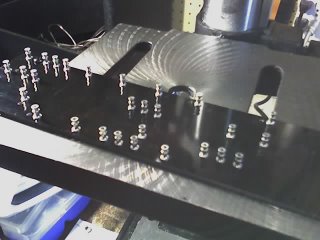
Here is the completed turret board.
--gh
This amp will be a 1x10 combo for my father-in-law this Christmas. I sure hope he does not read my blog. For his 75th birthday, last month, his family gave him an electric guitar. Right now he is playing through a solid state practice amp - so this would be a vast improvement (5 watts of tube sounds plenty loud). The title of this post are his initials, and I will put that on the faceplate, among other things.
 Here is the chassis and a few switchs and pots. Drilling the chassis is definitely what I am most nervous about. Then again, if I really screw it up, $20 gets me another one. The dimensions of this is 16x8x2 inches. When I do drill it, I will have to remember that it will be the reverse of my last effort, since a typical combo amp mounts the chassis upside down.
 This is my drill press, a typical bench top 10" model that goes for $100. In front is the electrical grade fiberglass that will serve as the turret board. Many of the passive electrical components will mount on this board. Here is a capacitor and resistor as well.
 In the foreground you can see my turret staking set up. I am using the drill press to flare the turret ends on the board. This is done by pressure only, you don't actually turn the drill on for this. After drilling a bunch of holes in the turret board with a #33 drill bit, it is ready for the Keystone 1509-4 double turrets. In the mid-ground, you can see the turret board with one turret loaded. Apparently people mess this up often by doing the whole thing upside down. I must have checked and re-checked 20 times. The turret staking tool cost $11 which is kind of a ripoff. I built the holder with the set screw in it, someone online wanted $25 for that. I built it out of parts I had laying around, and if I did have to buy them they would cost about 35 cents.
Here is the completed turret board.

--gh
Subscribe to:
Comments (Atom)

