Tuesday, September 12, 2006

HNB 4 ...some wood

bah
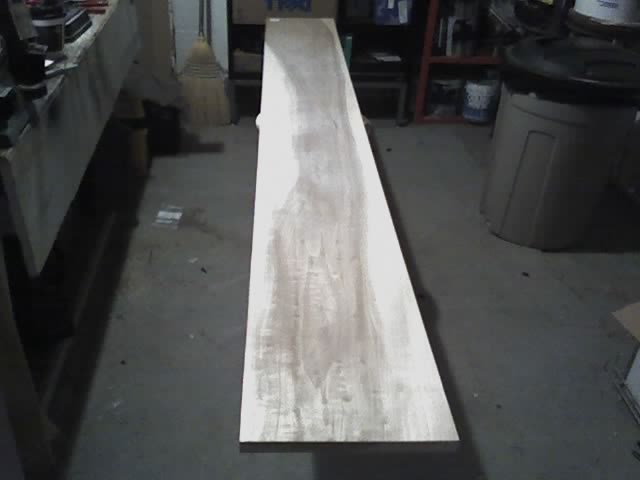
I was at the hardware store the other day picking up the wood for the cabinet. I can't remember why, but I wanted to have the cabinet assembled before finishing the chassis and painting it. Maybe I will remember why. Anyhow, I was set on pine again, but this is a gift. So, I spent twice as much and bought a length of poplar. Here you can see a bit of my workshop in the basement. It's nice to not have to do this type of stuff in the garage. It's still a bit chilly in the winter, though. My workroom is a small room that was formerly storage space for coal. I even have a coal door which is nice for bringing long things in and out of there. Yeah, coal... my house is old.

ram
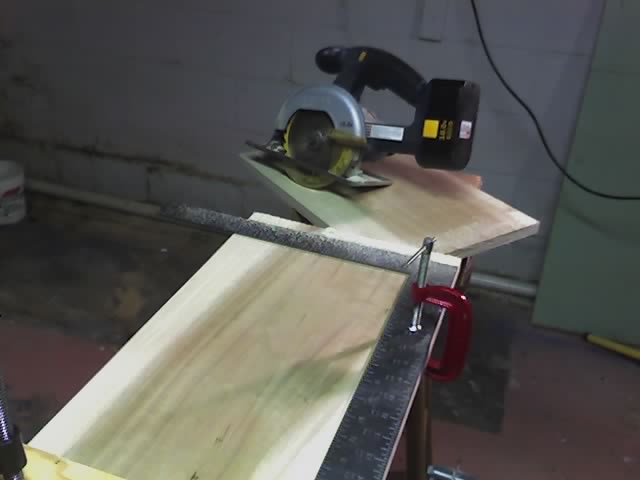
The poplar is 1x12, even though it will end up a little over 9 inches wide. I will rip these after I cut the dovetails. Right now I can't make the dovetail joint work by measuring first. The edges are off anywhere from a 1/16th to 1/8th inch. So, I will route the dovetail, mark the real edge, and then rip the final piece. This will leave a box shape 2-3 inches deep that has dovetail joints - I won't discard them. I think I will make some trays or something out of them. This is hard to describe without a picture. This room is right next to my workroom. It is just empty space in the basement next to the water heater and furnace. Our basement isn't filled with books or boxes or whatever. We are not packrats.

ewe
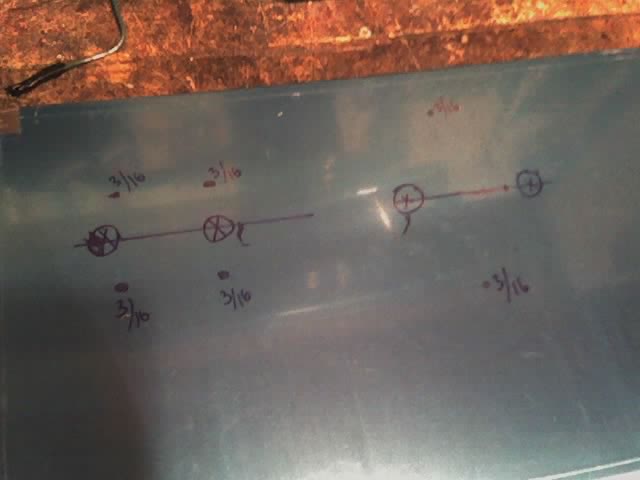
There is something very satisfying about having this project come from one single 8-foot board. Only 11 inches was left, which is why I went up in quality for the wood. Since it was only one board, it wasn't going to break the bank. I don't even know what poplar looks like as a finished product, maybe I should look into that and stuff. This is really going to be a step up from my first project. I am going to take this slow and do it right.

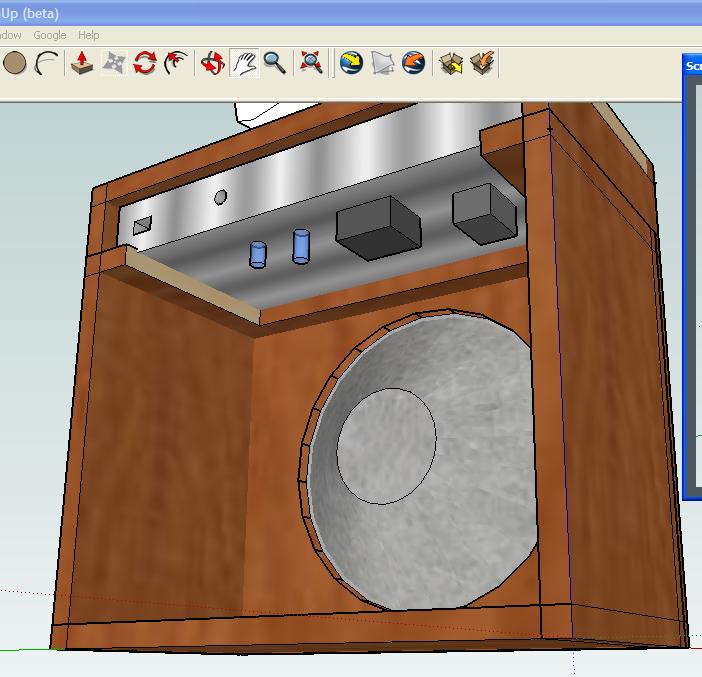
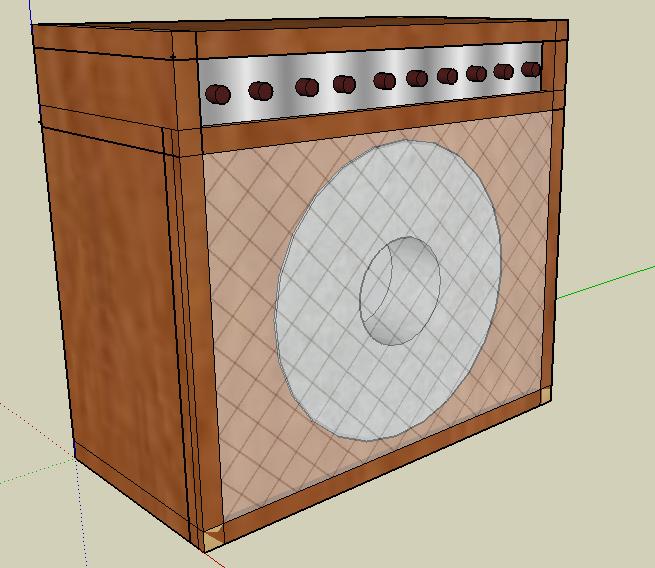
I even got some grille cloth for the speaker this time. There are several ways to do that, and I haven't made my mind up. I think I will permanently mount the speaker baffle to make the cabinet stiffer and stronger. I plan to use no fasteners whatsoever on the main cabinet. It will be glue only, and of course the dovetails. Integrating the speaker baffle will make it that much stronger, as well as the shelf for the cabinet. Once glued together, this will take a sledgehammer to take apart again.
--gh

Saturday, September 09, 2006

HNB 3.1 Drilling 95% done

Uncle ClickerI mounted the transformers and ran the primaries and secondaries through the chassis to check for fit. This gave me the opportunity to measure where the turret board will sit. I am varying the layout a little from the design I downloaded. I guess it makes it a little more mine. My first project had the parts ordered from one place and the chassis drilled and punched. I had no idea how big a part this actually was! It might surprise you that I had to order stuff from three different sources.

Uncle ClackerHeh, it didn't take long before I peeled off the plastic stuff that protects the chassis. I am going to sand it before I prime and paint it - so there isn't much to protect. After drilling almost all of the holes, I mounted some hardware to check for fit. This gave me an opportunity to see how much room I have for designing the faceplate. You might have guessed that the "name" of this amp is 'HNB.' This is the initials of my father-in-law, and this is the whacky way he writes it sometimes. I will get too creative with his faceplate, because it is a family gift. It would not be appropriate to have my taint all over it.

Well, I call it a faceplate, but actually I will draw right on the chassis. This is kind of a fun part of the project, I look forward to working on that in a few days. There isn't any step that I haven't enjoyed, it is all fun to me. Kind of a relaxing hobby. Something tells me that I will have this thing done by Christmas!

--gh

HNB 3.0 Drilling the Chassis

Uncle WiggleyThe headphone trick helped determine where to place the power and output transformer. Marking the mounting holes, it is time to drill. The small (3/16") holes are for mounting the transformers. The larger holes will be used to feed the primary and secondary wires through the chassis. I forgot to order grommets with my order - but this is something that should be found at the hardware store. I like the harware selection at Woodruff-Arnold, which is also where I buy the nuts, bolts, and various parts that make everything fasten together. A guy came to ask if I needed help, and I asked him if they carried rubber grommets. He didn't even think about it, he just said "no." About 30 seconds later, I was standing in the electrical hardware aisle right in front of a drawer that said "Grommets - Rubber." People.

clunkDrilling stuff like this screams for a stepper bit. Irwin sells one called "Unibit," but I ended up buying one from Greenlee. Actually, it came from Lowes. This one drills very neat holes from 3/16" to 7/8" in 1/16" steps. When drilling metal, be sure to clamp it down! For the big holes (like for the vacuum tubes), I spray WD-40 to keep the bit and the metal cool.

Click here, Einstein!In case you are curious, the chassis is made of aluminum. This makes drilling very easy. The chassis will be mounted upside down, and if I was dealing with a larger amp aluminum might not work so well. The higher the output, the larger the transformers. The cooling black transformer is the power tranny. The ugly-ish one in the middle is the output transformer. They are both from Hammond.

--gh

Wednesday, September 06, 2006

HNB 2.1 The Headphone Trick

You can read about the "headphone trick" here. Basically, I need to orient the power and output transformers to minimize a sympathetic 60-cycle hum. What happens is that the wildly swinging wall voltage is creating magnetic havoc in the PT. This can be sensed in the OT, even though it it is not plugged in. It seems kind of scary, but you have to wire up a power cord to the primaries on the PT, and then hook up some headphones to the secondary of the OT. Then screw around with the locations of the two transformers until you don't hear the disturbing hum.

Mary had a little lamb...

If this is not taken care of at this stage, then the small hum will never be removed from the amp. This is a magnet thing, and unless I wanted to get into mu-shielding, I would be stuck. Oddly enough, the hum was smallest when they were aligned parallel to each other. Every thing I read says to try it perpendicular. Well, that hummed!

...I am not that predictable.

Now the chassis is marked for drilling the mounting holes and the holes for the primaries and secondaries of each transformer. I might have gotten excited and drilled these holes. However, I just realized that I did not have the rubber grommets that protect the wires from the chassis. I didn't want to cut 1/2" holes, and then realize I couldn't find grommets that fit this! Luckily, our hardware stores carry these.

--gh

Every time a balloon pops, a clown dies.

I came up with this saying about 20 years ago.
Pennywise!

shameless plug
It's time it was promoted to popular culture with fashion! Uh... click to, like, enter a store and stuff. I think I sold a mug in the last year, so that store is really hoppin'!


--gh

Tuesday, September 05, 2006

HNB 2.0 Sketching the cabinet

Thanks to M for telling me about Google Sketchup. I didn't think I would use it at all, then I remembered I liked to sketch out amps before building them. (I also like to talk in absolutes about something that I have only limited experience in, like building my very second amplifier!)

Okay, so, I found a use for SketchUp!
Duck...

Here you can see that I have not finished it yet, and the chassis is not loaded in the cabinet....duck...
I even went through the hassle of adding some components to the underside of the chassis. You know, because that is important and stuff. Well, actually, I think I want to build in these rails to support the chassis, so this will show me to push the transformer in a bit for room.
...duck...

Okay, time to stop screwing around and to get back to building this thing!
...Goose!

Sunday, September 03, 2006

HNB 1.0 Parts gathered, start drilling stuff!

I have the pleasure of building another guitar amplifier. This will be based on the P1 project at the AX84.com website/community. This is exactly what I built last spring, but I am sourcing all the parts and get to drill the chassis and turret board myself this time. That's right, I got myself a drill press!

This amp will be a 1x10 combo for my father-in-law this Christmas. I sure hope he does not read my blog. For his 75th birthday, last month, his family gave him an electric guitar. Right now he is playing through a solid state practice amp - so this would be a vast improvement (5 watts of tube sounds plenty loud). The title of this post are his initials, and I will put that on the faceplate, among other things.

Clickety St. HubbinsHere is the chassis and a few switchs and pots. Drilling the chassis is definitely what I am most nervous about. Then again, if I really screw it up, $20 gets me another one. The dimensions of this is 16x8x2 inches. When I do drill it, I will have to remember that it will be the reverse of my last effort, since a typical combo amp mounts the chassis upside down.

McClickinsThis is my drill press, a typical bench top 10" model that goes for $100. In front is the electrical grade fiberglass that will serve as the turret board. Many of the passive electrical components will mount on this board. Here is a capacitor and resistor as well.

Click clic cli cl c...In the foreground you can see my turret staking set up. I am using the drill press to flare the turret ends on the board. This is done by pressure only, you don't actually turn the drill on for this. After drilling a bunch of holes in the turret board with a #33 drill bit, it is ready for the Keystone 1509-4 double turrets. In the mid-ground, you can see the turret board with one turret loaded. Apparently people mess this up often by doing the whole thing upside down. I must have checked and re-checked 20 times. The turret staking tool cost $11 which is kind of a ripoff. I built the holder with the set screw in it, someone online wanted $25 for that. I built it out of parts I had laying around, and if I did have to buy them they would cost about 35 cents.

Here is the completed turret board.
yeah, you click on it and stuff

--gh

Saturday, August 26, 2006

One of those photo blog entries.

Lately I have taken some pics and meant to blog on them. However, now that I have so many, I thought I would fit them all in one entry. So, they are reduced, and you know what to do to make them big again...

Yeah, you click on it. Duh!First, we have a picture from my father's house. He has a statue in a wall alcove with it's own lamp. I think it is hilarious, but my sister complains that it looks like a museum.

clickNext, we have a local picture. It may be hard to see, but this is a special plant that grows on the side of the road here in Northwest Missouri.

clackHere we can see the confusing statements written on the personal hygeine products in the Holiday Inn Express in Jefferson City. I think I have used "soften" as a conditioner at least twice. Behind is a haircap, and it says something stupid as well - I will have to check later to remind myself what it says ("keep dry?").

cluck?Ah, here is a Nodaway County original! I call this the Used Food Store because they have a lot of "repackaged" boxes of cereal in it. I think Terra had something to say about its products once. The cereal boxes have expiration dates on them that a are a few months old, and most of them looked like they have been opened and then taped shut again. Very weird. If the Amish family that runs this store is offended by my statements, just comment below and I will rectify this entry.

--gh

Monday, August 14, 2006

I was there! Honest! Here's proof...

Okay, thanks to the online Concert Ticket Generator, I will never have to admit again that I missed this show:
Forged?  You don't say!

--gh

Friday, August 04, 2006

Eico 667 issues

I thought I would share my success of bringing a 40-year-old piece of bench test equipment back into calibration. I just got an Eico 667 from eBay earlier this week and was not surprised that it needed a little help.

First, there is some great instructions here, at the Tone-Lizard site. It suggests replacing two rectifiers, two capacitors, and two potentiometers. That was easy.

There was still a problem with the MERIT test, however. I realized that the potentiometer behind the PLATE knob was not working at all. Since it is a 3K-ohm 4-watt pot, it is actually a rheostat. I took the back off and noticed a lot of buildup and gunk in there. I sprayed some CAIG deox-it in there and cleaned it with some swabs. I think I got it back up to spec which is good because I don't know if I can find a replacement for that. The GRID pot is similarly constructed, but with a switch and higher rating, so luckily that was fine.

--gh