Of course, my guitar is still being worked on.
Earlier, I told you that I wanted to build a 2x10 mini speaker cabinet that has switchable speaker combinations (A, A+B, A|B, B) and drew a diagram of the switch configuration. When I told an electronics friend that I wanted to do this, he asked incredulously "why wouldn't you want your amp and speakers to be operating at peak efficiency?" He deals with home and car audio, so I guess I understand his ignorance about how the guitar amp is part of the instrument.
My first speaker cabinet will have two different 10" speakers in it. (Okay, this is embarrassing, the model names are Ragin' Cajun and Delta Demon. I wish I could tell you that they were models E1121 and E1031 or something, but I suppose Eminence is appealing to a mentality slightly different than me.)
If you are freaking out about the 10 inchers, remember that this is for a 5 watt amp. I want to be able to crank this amp up a bit, but I really don't need the cone size of 2 12" speakers working for me.
So, it makes sense that I will want to have them able to play independently. In my switch, this is position 1 or 4. Then I want to hear what they sound like in series (8ohms + 8 ohms = 16 ohms). And, I might as well throw in parallel (8 ohm speakers in parallel is 4 ohms impedance).
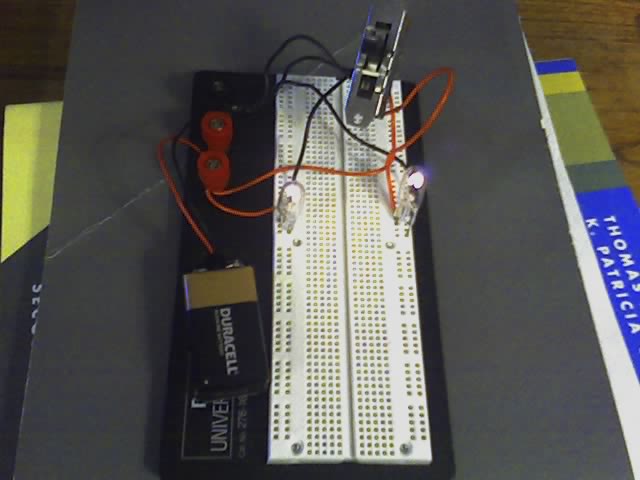
I mocked up a breadboard configuration, because I found the switch at Mouser.com. The breadboard uses two lamps, and 24 gauge wire, but the real version will have speakers and speaker wire (duh).
Here is position 1, which will be one speaker:

In position 2, you can see that two lamps working in series doubles the resistance. The speaker corollary to this situation is that the impedance will be doubled. But, I think this gets the point across:
Here is position 2, parallel circuits. Notice that each lamp can pull the same full current through them. (If you are wondering what kind of light bulb works on 9v batteries without frying, they are 12v auto bulbs I had lying around. This would kill a typical flashlight bulb.)
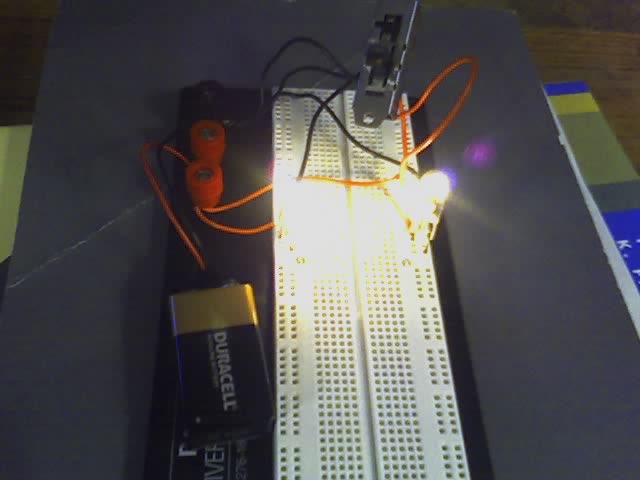
And, to complete this presentation, we have speaker B, position 4:

My experiments with a boxjoint jig was not successful. I think the jig works fine, but it was set up to move in 1/32" and 1/16" increments, and my table saw has a little play in it. Okay, I will admit that the jig I made is a little "racked." I really wanted to make nice and strong box joints for my speaker and amp cabinet. I own a router, but not a router table. So, I bought a template. However, the template is for through-dovetail joints. Those used to be fancy, but anyone with a router and template can make them which is why I wanted regular finger joints - they seemed less pretentious (this is about speakers and amps, not wood working). In case you are figuring that dovetail joints are stronger than box joints, you are correct. However, I really didn't want to have to use them. (I could have bought a box joint template for 50% more! I would have to PAY MORE MONEY to APPEAR LESS UPPITY!)
So, I wimped out and bought a template. If I am brave enough, I will take a picture of my aborted effort at table-saw box joints. (I hope you like my crappy camera phone pictures! It's my only camera.)
--gh
3 comments:
I don't understand a bit of this, but it seems cool. Maybe I will learn more about electronics in a future life.
I have a good article on cutting dovetails by hand. Of course, it requires a good dozuki, and you can't get even a moderate quality one for less than $75. It's weird that it costs more in equipment to do woodworking with hand tools than with power tools. I want to use planes more, but I'm intimidated by the wide variety of types and techniques, not to mention all the fussy stuff with sharpening..
-m
-m
The first "tool" that a home should have is a work bench.
The second tool is a vise, mounted to that work table.
And the third should be a bench grinder, also attached...
Probably third would be drill press, and I still don't have one.
--gh
Duh, I did not include why I posted that comment.
I was going with the fact that I have been successful sharpening my own plane with the bench grinder.
I know that is not how the pros do it.
--gh
Post a Comment