Tuesday, September 05, 2006

HNB 2.0 Sketching the cabinet

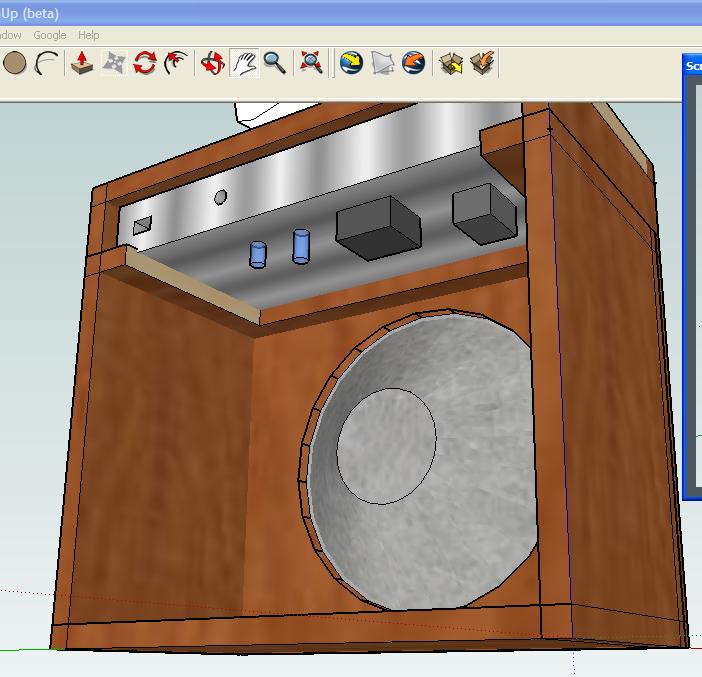
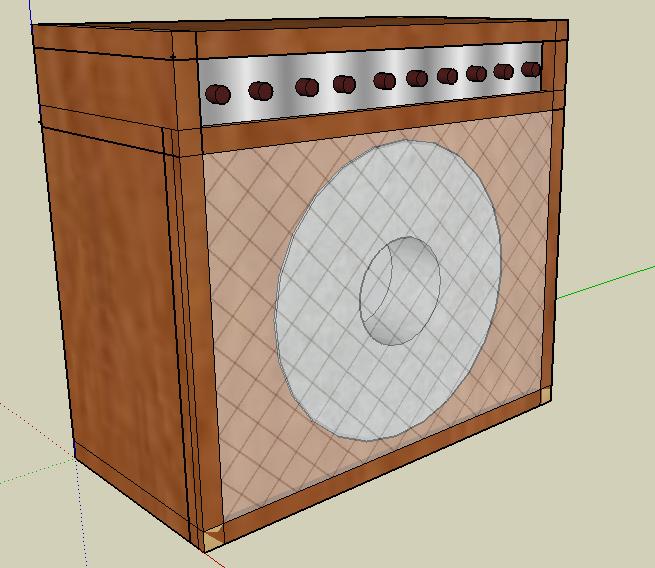
Thanks to M for telling me about Google Sketchup. I didn't think I would use it at all, then I remembered I liked to sketch out amps before building them. (I also like to talk in absolutes about something that I have only limited experience in, like building my very second amplifier!)

Okay, so, I found a use for SketchUp!
Duck...

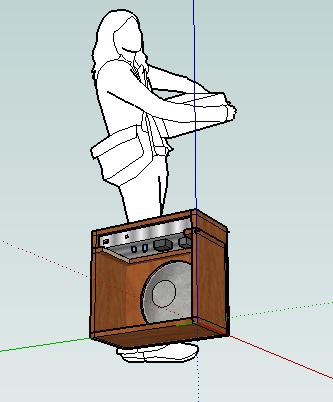
Here you can see that I have not finished it yet, and the chassis is not loaded in the cabinet....duck...
I even went through the hassle of adding some components to the underside of the chassis. You know, because that is important and stuff. Well, actually, I think I want to build in these rails to support the chassis, so this will show me to push the transformer in a bit for room.
...duck...

Okay, time to stop screwing around and to get back to building this thing!
...Goose!

Sunday, September 03, 2006

HNB 1.0 Parts gathered, start drilling stuff!

I have the pleasure of building another guitar amplifier. This will be based on the P1 project at the AX84.com website/community. This is exactly what I built last spring, but I am sourcing all the parts and get to drill the chassis and turret board myself this time. That's right, I got myself a drill press!

This amp will be a 1x10 combo for my father-in-law this Christmas. I sure hope he does not read my blog. For his 75th birthday, last month, his family gave him an electric guitar. Right now he is playing through a solid state practice amp - so this would be a vast improvement (5 watts of tube sounds plenty loud). The title of this post are his initials, and I will put that on the faceplate, among other things.

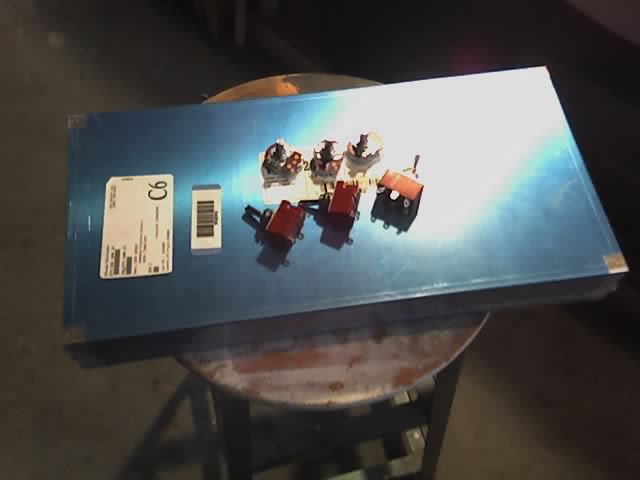
Clickety St. HubbinsHere is the chassis and a few switchs and pots. Drilling the chassis is definitely what I am most nervous about. Then again, if I really screw it up, $20 gets me another one. The dimensions of this is 16x8x2 inches. When I do drill it, I will have to remember that it will be the reverse of my last effort, since a typical combo amp mounts the chassis upside down.

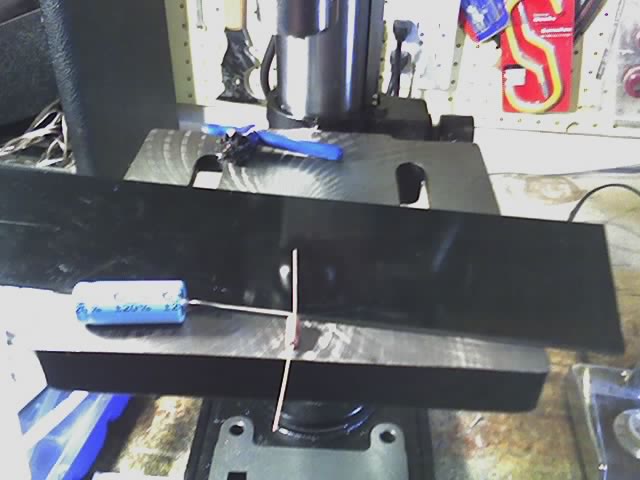
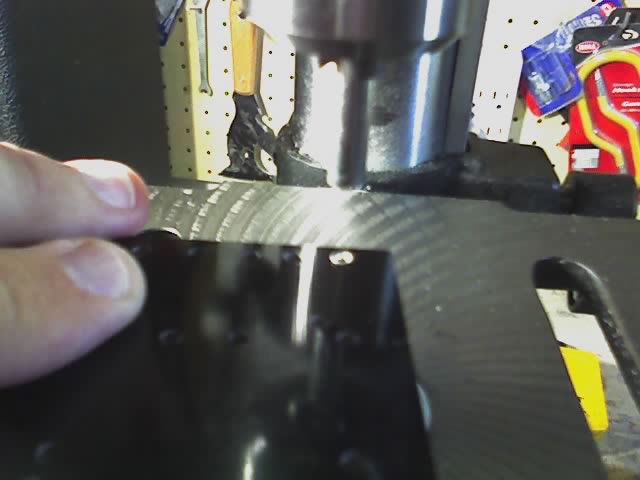
McClickinsThis is my drill press, a typical bench top 10" model that goes for $100. In front is the electrical grade fiberglass that will serve as the turret board. Many of the passive electrical components will mount on this board. Here is a capacitor and resistor as well.

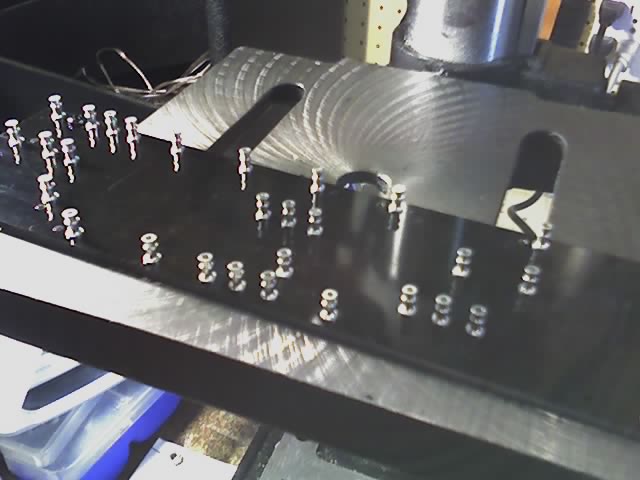
Click clic cli cl c...In the foreground you can see my turret staking set up. I am using the drill press to flare the turret ends on the board. This is done by pressure only, you don't actually turn the drill on for this. After drilling a bunch of holes in the turret board with a #33 drill bit, it is ready for the Keystone 1509-4 double turrets. In the mid-ground, you can see the turret board with one turret loaded. Apparently people mess this up often by doing the whole thing upside down. I must have checked and re-checked 20 times. The turret staking tool cost $11 which is kind of a ripoff. I built the holder with the set screw in it, someone online wanted $25 for that. I built it out of parts I had laying around, and if I did have to buy them they would cost about 35 cents.

Here is the completed turret board.
yeah, you click on it and stuff

--gh

Saturday, August 26, 2006

One of those photo blog entries.

Lately I have taken some pics and meant to blog on them. However, now that I have so many, I thought I would fit them all in one entry. So, they are reduced, and you know what to do to make them big again...

Yeah, you click on it. Duh!First, we have a picture from my father's house. He has a statue in a wall alcove with it's own lamp. I think it is hilarious, but my sister complains that it looks like a museum.

clickNext, we have a local picture. It may be hard to see, but this is a special plant that grows on the side of the road here in Northwest Missouri.

clackHere we can see the confusing statements written on the personal hygeine products in the Holiday Inn Express in Jefferson City. I think I have used "soften" as a conditioner at least twice. Behind is a haircap, and it says something stupid as well - I will have to check later to remind myself what it says ("keep dry?").

cluck?Ah, here is a Nodaway County original! I call this the Used Food Store because they have a lot of "repackaged" boxes of cereal in it. I think Terra had something to say about its products once. The cereal boxes have expiration dates on them that a are a few months old, and most of them looked like they have been opened and then taped shut again. Very weird. If the Amish family that runs this store is offended by my statements, just comment below and I will rectify this entry.

--gh

Monday, August 14, 2006

I was there! Honest! Here's proof...

Okay, thanks to the online Concert Ticket Generator, I will never have to admit again that I missed this show:
Forged?  You don't say!

--gh

Friday, August 04, 2006

Eico 667 issues

I thought I would share my success of bringing a 40-year-old piece of bench test equipment back into calibration. I just got an Eico 667 from eBay earlier this week and was not surprised that it needed a little help.

First, there is some great instructions here, at the Tone-Lizard site. It suggests replacing two rectifiers, two capacitors, and two potentiometers. That was easy.

There was still a problem with the MERIT test, however. I realized that the potentiometer behind the PLATE knob was not working at all. Since it is a 3K-ohm 4-watt pot, it is actually a rheostat. I took the back off and noticed a lot of buildup and gunk in there. I sprayed some CAIG deox-it in there and cleaned it with some swabs. I think I got it back up to spec which is good because I don't know if I can find a replacement for that. The GRID pot is similarly constructed, but with a switch and higher rating, so luckily that was fine.

--gh

Tuesday, July 25, 2006

The eBays... (...plus Andy46477)

Getting a new project started has meant resorting to eBay for 40 year old electronic manuals. I am not a power seller, as I only had 2 transactions before this month - spread over a 5 year period! In case you are interested, it was a fishing reel (Abu) and a CD (Village Stompers).

This was before PayPal was as big as it now is. But I do remember that the feedback system of eBay seemed much simpler. As soon as a money order cleared, I got positive feedback and I was excited about what the mail brought me. Then, when I was happy I left positive feedback.

I haven't been keeping up with eBay, and I am sad to see that sellers no longer leave feedback when payment clears. Surely this is a problem. I am dealing with 5 sellers right now, so this is more than a trend - it appears to be the rule now. For each transaction, I paid immediately (PayPal), within 5 minutes actually. As a buyer, I fulfilled my obligation (payment) so I deserve feedback (he paid, duh!). What are they waiting for? They are waiting for me to leave a positive comment -THEN they leave a positive reply, hopefully.

I read up on this and it is an active discussion off-site. The seller is holding the positive feedback as some kind of ransom, and will retaliate if they even get a neutral. This is a crap way to do a transaction.

My solution is for a PayPal/eBay feature that says average time for payment. If I was a seller, I would be very impressed with someone who always pays in less than a day (or within the hour). As a buyer, it is frustrating that they don't feel pressured to get the item into shipping as soon as possible. (This wouldn't be the case if they were more worried about feedback.)

Clearly, the system doesn't work right now. I am tempted to not leave feedback for any of these five sellers. None at all. But, I probably will. Then I will hope and pray that they also leave positive feedback. Stupid, simply stupid. How can something as big as eBay screw something like this up.

Speaking of which, meet Andy46477. Somehow, he leaves comments on other people's feedback area. Since it is all positive, he doesn't have any negatives. But, a few people are confused (and a few get it and leave funny replies). Most of them are plays on the member's name, but some are completely random. Here are some of my favorites:
  • When I open boxes of cereal, you should be inside. Yes, you're THAT GOOD! (membername is "toy")
  • Has INTEGRITY! Refuses to live on the MOON! Retains his SANITY! (membername is "earthbaby")
  • I have cancer so I bid low. I cry when I'm outbid. My dog died yesterday. (a little dark, but the membername is "happy")
  • I would like to shake your hand. I do not have any arms, though. I'm sad now.
  • Wow! This has to be the ROUNDEST coin I've EVER seen! Quite impressed. Thanks.
  • Great seller! Who cared for me when I was sick? You got it - jazztime did.
  • Has intestinal FORTITUDE!!! Eats PORTIONED meals!!! Enjoys NOURISHMENT!!!
  • Fast shipping. Polite responses. Has all his teeth. Doesn't beat his wife.

Nice. It shows how meaningful the feedback system on eBay is.

--gh

Monday, July 24, 2006

New Project (Thy name is Fisher)

I am excited to begin my next project. It is now time to restore a 43-year old piece of audio history, a Fisher X-1000 amplifier!

The Fisher
My father bought this in 1963 and had it in regular use for over 30 years. It has been sitting in the basement of my brother's house for the last decade. I am nearly certain that it has not seen the mains in that period, which is good and bad. (The bad part is that capacitors can deteriorate when unused. The good part is that no one plugged it in to try it out slamming it with instant 120V of wall current.)

Amazingly, I don't have much to clean up here. I took off the bottom and inspected the circuitry. It did not appear that anything was wrong (no burnt parts or anything). I think it just got marginalized, and then replaced with new equipment and put away. It had a little bit of dust on it, which I blew off with the air compressor. I will clean it up quite a bit, because I have seen some amazing pictures of shiny equipment.

Not too bad
As you can see, it is already pretty sharp looking. The X-1000 is an integrated stereo amplifier (preamp and amp together) capable of over 50 watts per channel (I think it is technically 110w total). I also have the Fisher K-10 Spacexpander, which is just a pan reverb unit. Ordinarily, I would not really care to bring this back - but there is a control for it on the front of the X-1000! I sort of have to, don't I?

I do have tubes, and the tube shields. I removed the tubes to transport this, because it drove 1,200 miles in my trunk a few weeks ago! If you think you are seeing tubes, they are actually cap cans.

I also got my hands on the Fisher FM 200-B receiver. I will start on that after I get the amp going. Tube receivers can be very complicated because of the oscillating tube, and the tuning of the circuit.

As you can see, I do not have a cabinet for this amp. I will build my own out of something silly like walnut or something. Hopefully it won't be too heavy - because the amp by itself weighs 44 lbs. I talked to my father yesterday about it. He was surprised that I could get over $1,000 for just the amp as it is right now. Restored, tuned up, and in a cabinet, it could fetch $1,500. The tuner could easily go for half that! The reverb unit goes for a few hundred...

What is weird is that I don't have decent speakers. I mean, any speakers I have laying around truly suck. I can't have a high-quality stereo system with sluttish speakers, so I will have to see about that this winter. (I think the speakers that were used with this unit were Wharfedale. I can only dream.)

Here is a short list of what I will do:
  1. Finish cleaning the outside.
  2. Get the schematic and identify the coupling capacitors and order replacements.
  3. Buy a variac (variable transformer).
  4. Replace some capacitors, and the diodes if they are not silicon.
  5. Hook it up to the variac and slowly bring up the voltage. (Folks at AudioKarma suggest 1 hour for every 10 volts until 90, then leave it for a night. Next, put the output tubes in and slowly bring it up to full voltage.)
  6. Measure the voltages and compare it to specs.
  7. Bias the output tubes (there is an external trimpot for this!).
  8. Adjust the negative feedback (DC adjusted with trimpot again).


--gh

P.S. The agreement for removing this from my brother's basement is that I won't sell it. He doesn't have to worry about that!

Tuesday, June 13, 2006

Free Guitar Riff Lessons

Check out Marcos Farhat's website: www.farhat.name. I usually don't put the name of the link in the link, but I just love that web-page name.

Anyhow, Mr., er, Señor Farhat is an Argentinian guitarist who has a few dozen classic rock intros, riffs, and solos in multiple camera angles. Twenty-five years ago, I would have been all over this (that's how old most of the songs are, hah!).

For now, the site is not riddled with popups (but it is available in multiple languages, which is cool). He is trying to make the site supported by advertising, donations, and the sale of his videos (which if you are dying to learn Metallica and Iron Maiden licks in higher resolution - it looks like a must).

Anyhow, if I ever go to Argentina, I would want to meet Marcos. From his C.V., it looks like he is about my age - and has impressive experience in music.

I wish I had the ability and the time to create a website to teach like that. My angle would be on teaching guitarists how to read music (a massive VOID in the music world). Sadly, the education of most guitarists is from chords to tabs. I'm not helping out yet, either...

--gh

Monday, June 12, 2006

Pot Transplant...

No, the title is not talking about getting the tomatoes out.

For such a cool guitar, the Gibson Les Paul really has some issues. Earlier this year I wrote about having the fingerboard planed correctly (it was an issue all along, and not due to time or warping). Well, on Friday I performed surgery on my 1979 Custom and replaced the volume and tone pots, as well as the tone caps. Here is what things looked like before (note the anemic looking caps).


I replaced everything with the wiring kit from RS GuitarWorks. I just measured the pots and they were:
Volume: 327k ohms & 217 k ohms
Tone: 87k ohms & 91k ohms

Those tone pots were probably fine, but those Vol pots were replaced with 500k pots, a BIG improvement. Also, check out this stock photo of the kit - I sure hope those $15 caps were worth it! (Hovland musicaps, lol.)


The thing is, the sound is vastly improved. I never liked using the tone pots on this thing (anything less than 10 sounded muddy). The volume control was dark as well when that was rolled back. A lot of people that make this modification also change out the pickups, replace the bridge and maybe even the tailpiece. When someone asks "was it improved" they say "yes, but I cannot tell how much the improvement is from the new components, or the pickups, or..."

I only made the changes in the wiring this time. I can honestly say that this improvement is only matched by getting new pickups. The difference is that striking. The sound is clear at all levels, and the tone knobs are now fun to use for the first time (in 27 years!).

So, if you have a guitar with questionable componentry - may I suggest this upgrade.

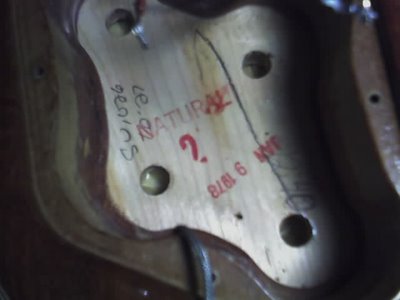
Here's a cool picture with all the wiring removed. You can see the date (Jan 9, 1978) as well as the color scheme ("NATURAL"). It's not really rare or anything, but I have always liked the fact that this guitar has no fancy paint job on it. Just a clear finish (no flame or quilt-top either, just boring maple). Neck is maple too, and not mahogoney. (The guitar's serial number says that it was completed on January 11, 1979[!] in Nashville TN - so you can see that things moved quickly in that plant then.)


Oh, and if guitar talk bores you, here's a picture I took on the way to work. Yes, that is a purple toilet with flowers in it. The sign says RELAY FOR LIFE on it, but I thought they do that in September around here...


--gh
Friday, June 09, 2006

Tubes and such...


Just screwin' around with Illustrator...