In an email to M, I was trying to think of a word for the ability to detect stupidity. I can see that Dumbdar is in pretty good use. But, for some reason I don't care for it.
How about "Duh," rather than dumb? I give you --> Duhdar
So, I think I have a really well-developed duhdar. But recently I was talking with Amy about someone that I only just realized was dense. This person has an interesting personality that could be described as insincere and abrasive. This might be cynical, but I usually associate those types of personality traits with smarter people.
Honestly, most of my dumber acquaintences are less sophisticated, but usually affable. So, if you want to fly under my duhdar, just act impertinent, impudent, and impetuous. (Actually, I think those are mostly synonyms, but if you are on my duhdar, you don't know that.)
--gh
Friday, December 01, 2006


Saturday, November 25, 2006
...when I was a kid.
I am middle aged, quickly approaching the top of the hill in 18 months. After that, I will be "over the hill" and be able to spout off tidbits of wisdom about my experience that know one cares about. So, I will describe some of the things that were different "when I was a kid."
Number one, as I tell my IntroGeog class, there was broken glass every where. Bits of glass from discarded bottles were strewn across our gutters, streets, creeks, and even the beach. I loved finding bits of colored glass worn down by the seashore. Each summer I would get at least one bad cut on a bare foot from broken glass.
Next, I am absolutely sure that there were a lot more bees when I was little. I would usually get stung 2-3 times each year! I can't remember the last time I heard someone talk about being stung by a honeybee. Something is wrong with the bees.
Finally, and I am not kidding, there used to be a lot more white dog poo. As a kid, I was fascinated by the process of how a dog mird changes into a crumbly white substance. Due to its ubiquitous nature, we even had a word for it: PURVY. (There is no "e" in that word.) My cousin Bradly told me that the Egyptians used it to make the blocks of the great pyramids to stick together. When I was a kid, there was purvy in every yard. I can't remember the last time I saw purvy...
--gh
Number one, as I tell my IntroGeog class, there was broken glass every where. Bits of glass from discarded bottles were strewn across our gutters, streets, creeks, and even the beach. I loved finding bits of colored glass worn down by the seashore. Each summer I would get at least one bad cut on a bare foot from broken glass.
Next, I am absolutely sure that there were a lot more bees when I was little. I would usually get stung 2-3 times each year! I can't remember the last time I heard someone talk about being stung by a honeybee. Something is wrong with the bees.
Finally, and I am not kidding, there used to be a lot more white dog poo. As a kid, I was fascinated by the process of how a dog mird changes into a crumbly white substance. Due to its ubiquitous nature, we even had a word for it: PURVY. (There is no "e" in that word.) My cousin Bradly told me that the Egyptians used it to make the blocks of the great pyramids to stick together. When I was a kid, there was purvy in every yard. I can't remember the last time I saw purvy...
--gh
Tuesday, November 21, 2006
By request
There was a request to put the Multicultural Revolution on a shirt, so here is one for the ladies...

...and one for the dudes.

--gh
...and one for the dudes.
--gh
Saturday, November 11, 2006
Phases
One of the things I like about the Fender Stratocaster is when the pickups are out of phase in positions 2 and 4. This hollowed out nasal sound sounds good clean and dirty. This is an electrical change by switching the leads. But if you switch the leads on a PAF-style humbucking pickup, you will make the cover hot, and add a lot of noise. Kind of defeats the whole humbucking point.
The closest that you can get to that sound is to take one pickup apart and flip the magnet around. No need to post pictures, you can read all about that process here. Also, no need to try and record what this sounds like, because you can see a demonstration here.
What I am hearing is very similar to what he has. The slight difference could be his 1965 BFDR! Man, I could be jealous of that amp. Thinking positively, since those designs are in the public domain now, I think I will just build one.
This pickup modification is usually called the Peter Green mod. Peter Green was in the original Fleetwood Mac lineup, you know, when they were a real rock band. The modification is partly apocryphal, did he just flip the neck pickup, or did he flip the magnet in the pickup. Was this deliberate, or a serendipitous accident? Since he went on an LSD trip and failed to return fully, the world may never know. Oh, but subsequent analysis of his guitar proved that the magnet was indeed reversed...
--gh
The closest that you can get to that sound is to take one pickup apart and flip the magnet around. No need to post pictures, you can read all about that process here. Also, no need to try and record what this sounds like, because you can see a demonstration here.
What I am hearing is very similar to what he has. The slight difference could be his 1965 BFDR! Man, I could be jealous of that amp. Thinking positively, since those designs are in the public domain now, I think I will just build one.
This pickup modification is usually called the Peter Green mod. Peter Green was in the original Fleetwood Mac lineup, you know, when they were a real rock band. The modification is partly apocryphal, did he just flip the neck pickup, or did he flip the magnet in the pickup. Was this deliberate, or a serendipitous accident? Since he went on an LSD trip and failed to return fully, the world may never know. Oh, but subsequent analysis of his guitar proved that the magnet was indeed reversed...
--gh
Saturday, October 28, 2006
HNB 10.0 The final product
 Finally, I am about 99% done with this build. I still need to protect the corners will metal covers. They will be black. This was a lot of fun to put together because I sourced none of the work out. In contrast, on my first amp the chassis was punched and drilled and the turret board was drilled and loaded with eyelets. Bought as a "kit" meant that all of the components were purchased together. Here, I had to use 3 different online sources.
 This works well as an open back cabinet. The speaker is an Eminence Copperhead which has a very clear sound and is very efficient (99db sensitivity, I think). For one speaker, this little 10" really cranks. Considering the amp is only 5 watts, it amazes me how loud this thing gets. It is too loud for home use if you crank it up all the way. If I lived in an apartment, the neighbors would be complaining.
 The light on my first amp is a bluish purple. I got to choose this one, so I came up with a goldish yellowy brown color. The first time that little lamp glows is a major victory. It glows when you turn on the power switch. The next switch is standby, which heats the tubes but gives no power (B+) to the rest of the circuit. The last switch is called "MUTE" but it really just makes the high gain setting work at lower volumes. Maybe I should have labeled that something different. At least it wasn't a mispelling!
 The heavy inked area for the name of this amp looks cracked from a certain angle. Straight on it seems fine, though. There are minor imperfections all over this build - in the wood work, the lettering, and of course the finish (I am heavy handed at spray paint and lacquer). However, it is 100% my own work, and sounds absolutely amazing. Family members have sent checks to offset my costs, do this will be a family gift to my father-in-law.
 The tone controls are actually very responsive. The thing really sings if you leave them full on, but turning down the treble, mids, and bass help balance the sound for the different guitar setup. My favorite clean sound is with the GAIN setting on 3, and the master VOLUME on 6-7. With my Les Paul, I can get some nice jazz like sounds. I would love to hear a real archtop through it, though. Because it is a low-power amp, you can get some great distortion at a sound pressure that doesn't split your ears. I don't think I ever need to go above 20-30 watts in this lifetime. (In case this stuff is new to you, a 50watt amp would be twice as loud as a 5watt amp.)
I may post one or more times about this build, maybe showing the corners and stuff. But for now, we can pretty much consider it done. Aww, look at it.
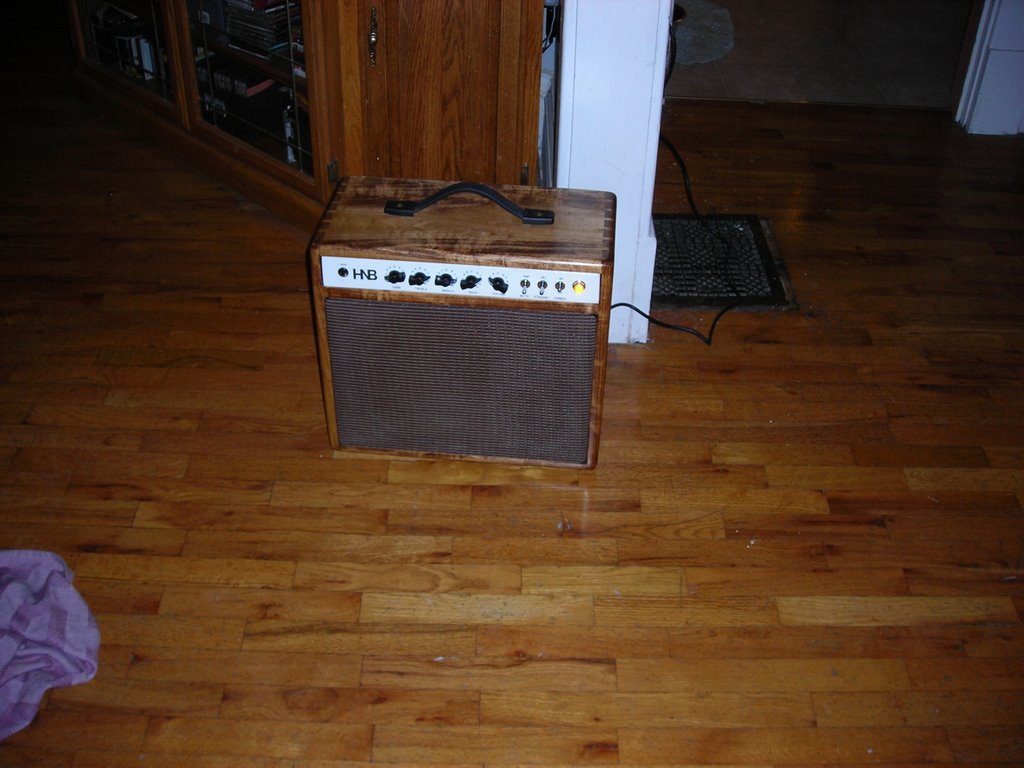
--gh
HNB 9.0 Final soldering
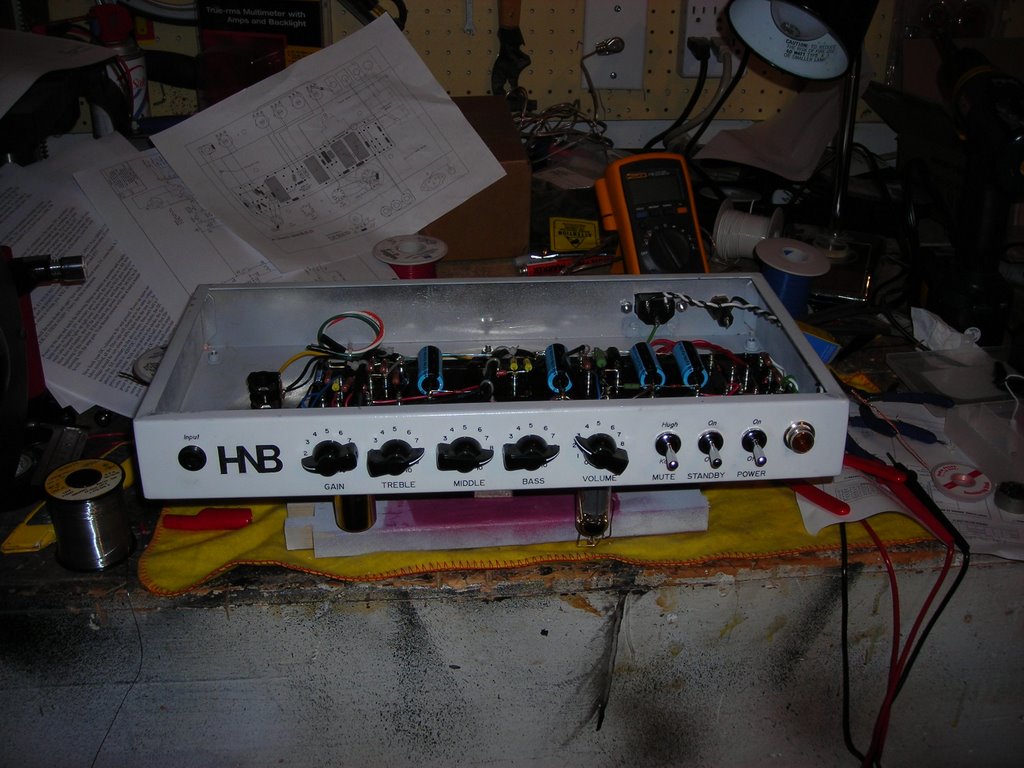 Here is the amp nearly done, from the front. As mentioned earlier, this would be the time that I would debug the amp for possible problems. Well, on this build I had no appreciable B+ voltage, even though the rectifier was working fine. Those silly electrolytic capacitors were all in there backward. Usually the marking is very clear as to which side is negative. The black stripe with no arrow wasn't helpful for me. I wrongfully guessed that the black stripe corresponded with the black end cap, marking that as negative. Duh, that black cover was on the crimped side, and usually it is there to insulate it from the casing. The casing is usually grounded, and the negative side is silvery. Well, it could have been worse for debugging, and luckily I did not destroy these four capacitors ($2.50 each!).
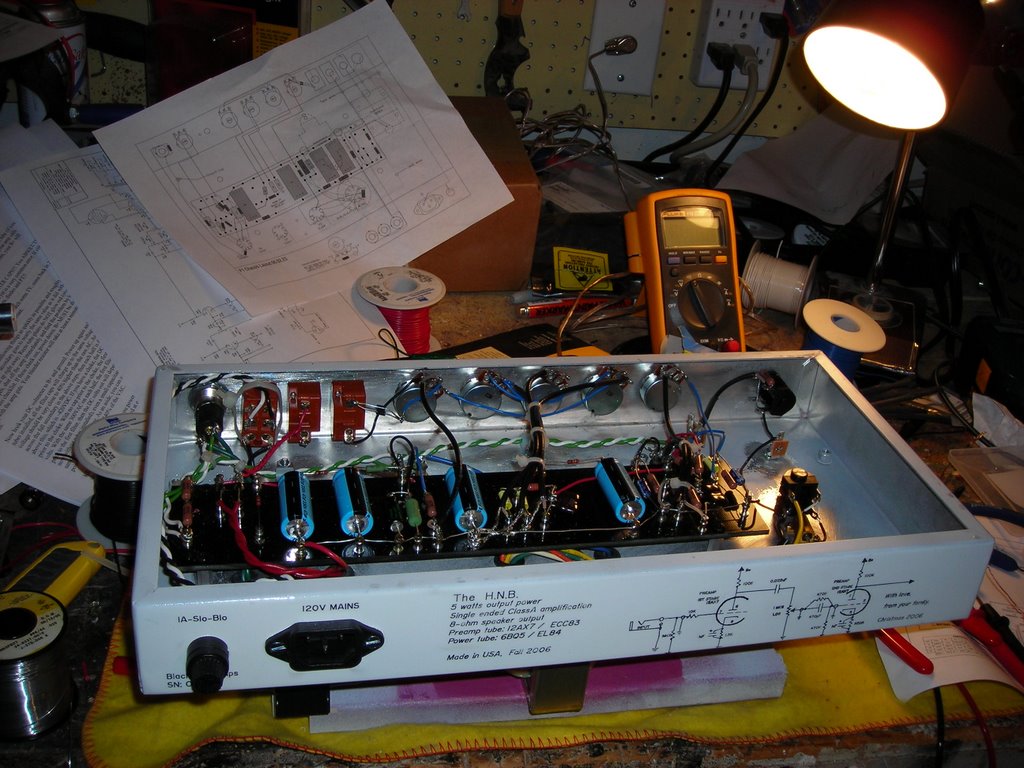 Here you can see that I sketched a part of the schematic on the back of the amp. It is the preamp stage. I wrote that this was "BlackLine Amp Serial Number: 00002," except that I mispelled it "BlachLine." Oh well. Look in the back of the workbench, I installed a permanent 1/4" audio jack for my amp building projects. It is connected to a speaker only for this purpose.
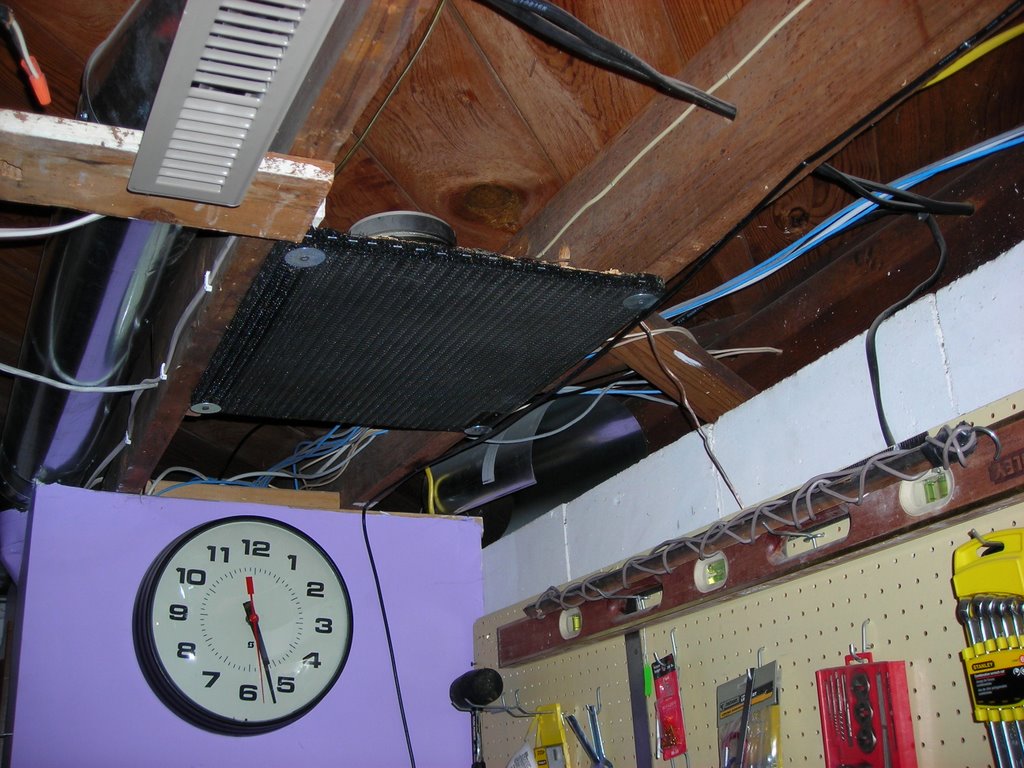 ...and that speaker is mounted to the ceiling of my workshop! This is a nice 12" speaker from an old Dean Markley amp from the 1980s. I can sort of use it for some hi-fi stuff as well for basic debugging. The sound is weird coming from the ceiling! Behind that you can see the workshop clock mounted on my little data closet. Inside that small room is the nerve center for all the phone, cable, satellite, and ethernet connections.
--gh
HNB 8.0 Loading the turret board
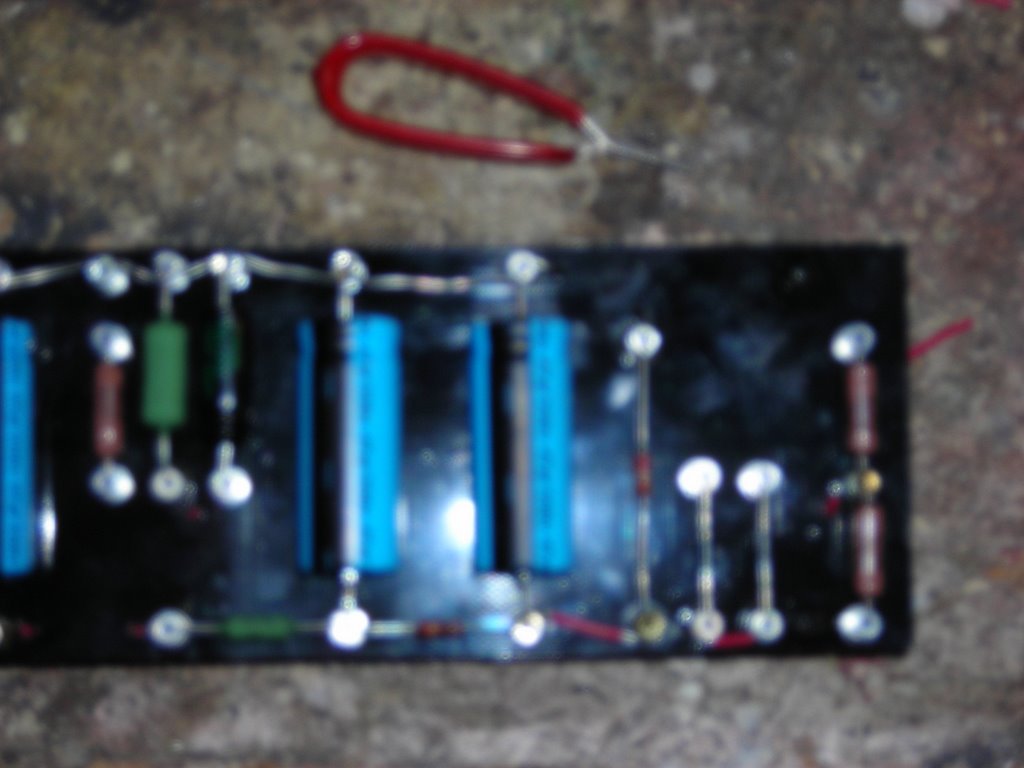 I love absolutely every stage of building this amp. I began a few months back by drilling holes and mounting turrets in this fiberglass board (called garolite). Now I finally get to load some of the electrical components like these electrolytic capacitors. If there was a stage of building that I was apprehensive about, it would probably be the debugging stage. (That's when I found out that I mounted all of these power filtering capacitors reversed!) The little red handled doohickey is used as a heat sink. When soldering capacitors and diodes, you clamp this on the leads to absorb the heat. Resistors can handle a lot of thermal abuse, so I might skip using the heat sink on that. Sometimes I use a hemastat that I have laying around, but that sort of makes me feel like a stoner.
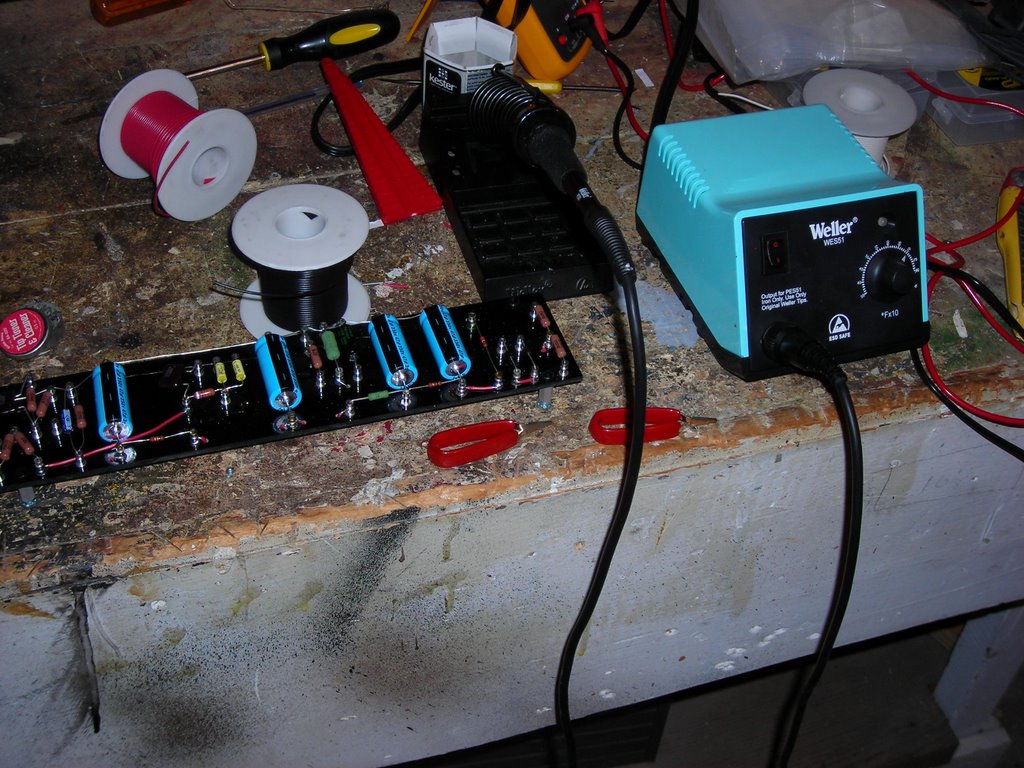 Here is the turret board fully loaded. I could only solder about half of the turrets because some of the wires from the tone and volume controls or the tube sockets will also connect to this board. In this picture you can see my Weller soldering station. It is not the fanciest, but it is a big improvement over soldering with one of those cheap irons. In the back you can see the wire that I used for 80% of this build. It is 22 gauge solid core. It is fairly skinny stuff, and very easy to work with. The last time I used 18 gauge stranded and it got sort of messy.
Actually, it was messy because I used eyelets, and not turrets. Also, I made the mistake of soldering everything 100% on. After putting it in the chassis, I had to desolder about 20 connections to hook up the wire. Being thicker and stranded it got messy fast. Solid core wire stays, which makes debugging hums and squeals nice. If you move it too much, it could break on the inside (almost impossible to find at first) which is why stranded has its advantages. I still used the 18-gauge stranded wire for the primary electrical connection to the power transformer, and for the heater circuit (higher current that actually makes the tubes glow). But the 22 gauge stuff was really a pleasure to work with.
--gh
Saturday, October 21, 2006
HNB 7.0 - Mounting stuff on
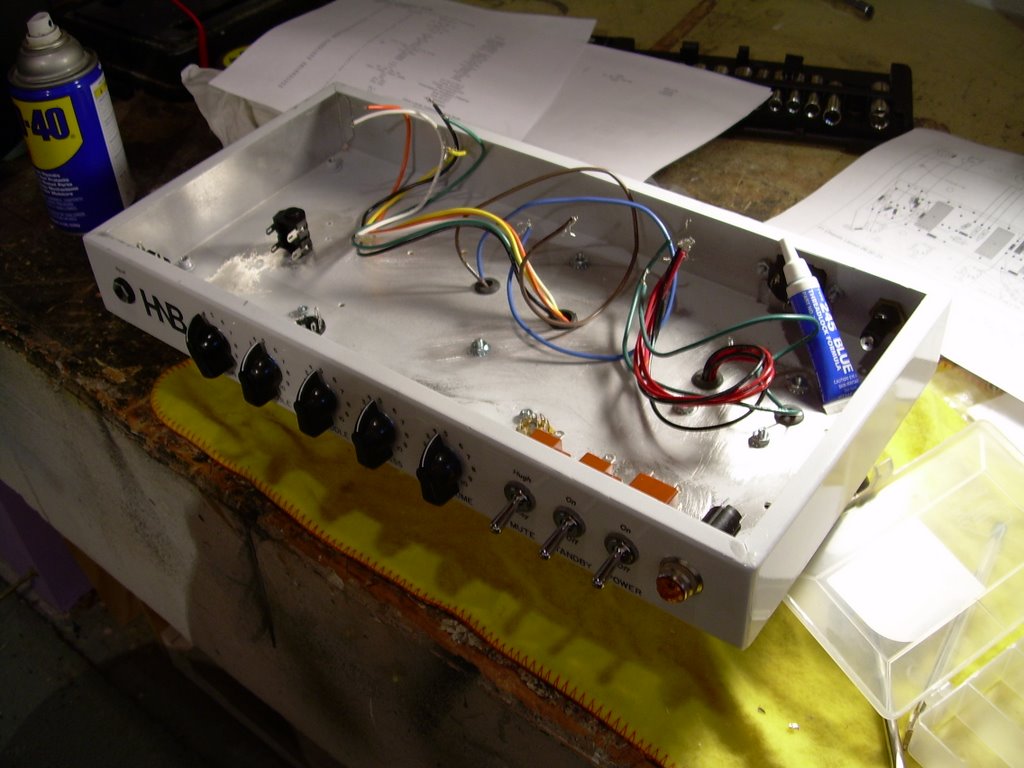 I couldn't wait to mount those components. Most of these things will stay on the chassis, and I will solder and wire them up in place. The only thing I think I will remove to wire up is the input jack - but I couldn't get a feel for how this thing will look without that in there! In this image you can see the thread lock fluid that I use for all of the bolts. It tastes sweet, really sweet - like in a saccharine sort of way. When I monitored weather stations on the side of mountains in Montana, I used to taste the propylene glycol when I was bored. (We used that as an environmentally friendly antifreeze.) I eventually know what most hobbies that I work on taste like.
  From the outside, the thing really looks done. It is all an illusion, though. I hope to be hearing something out of this within the week, though. The transformers will hang down from the chassis, so that is why everything looks upside down when I turn the chassis like this. For a second, after I lettered up the whole face of this thing, I thought that I had forgotten this detail and did everything upside down. I was just messing with myself - it was fine. I really wish that output transformer had some bells on it, it's a little on the ugly side.
 I'll try to refrain taking whole image shots until I am really done with it. However, you can see what one little corner might look like. I knew that this would be a tight fit, but it was a little too tight. Before I painted it, I mounted threadserts so that I can screw the chassis to the cabinet. It bumps out about a quarter of a millimeter, but this was within the tolerance of my fit. Also, before painting I put some Bondo on the corners and on some rough spots. So, the chassis was tight enough that it didn't fit! I had to file out a place for the threadserts to glide on the little shelf, and use some candle wax to make it slide in and out better. I won't refinish that part, because it is never meant to be seen with the chassis properly mounted.
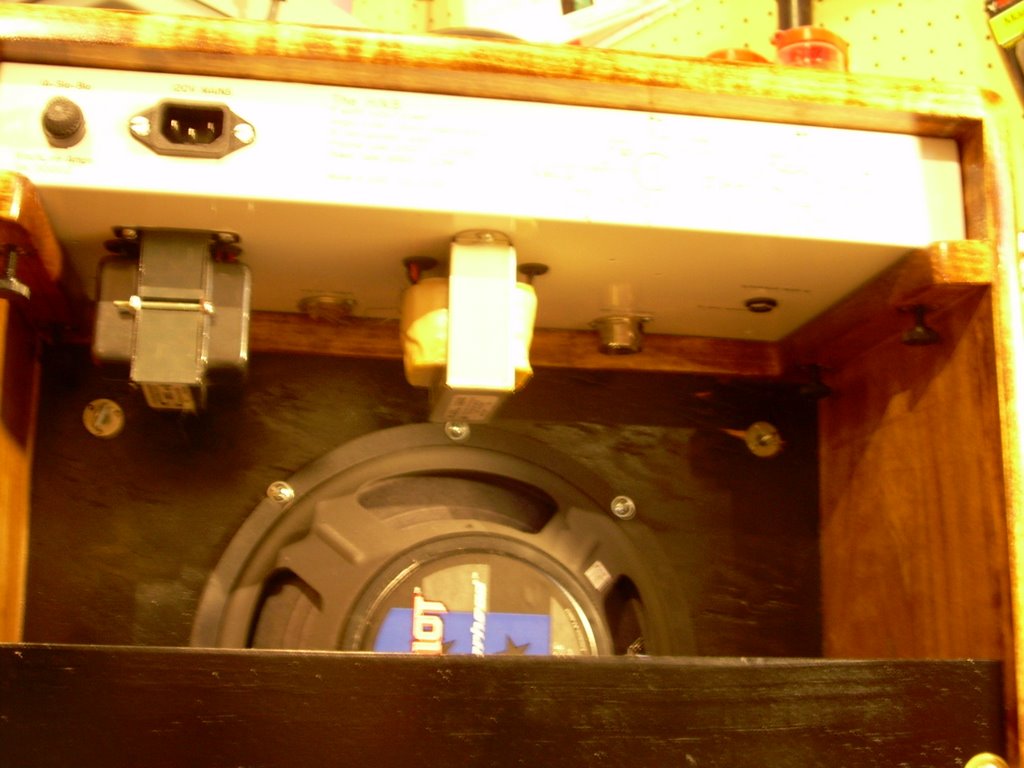 Here's a little view from the back. I am using Amy's new digital camera, and I don't know how to put the flash on! I know that those tubes look close to that shelf in the front, but it is over an inch away. I am not worried about heat, in case you are curious. The preamp tube (12AX7) never gets too warm, but that power tube (EL84) can cook flesh. So, I guess I am glad it is way up in there.
The next thing I will do is to solder some components to the turret board. That should be fun because I did not use turrets last time.
--gh
HNB 6.0 - Lettering the Chassis
 Putting the markings on the chassis happens to be one of my favorite parts of building an amp. Of course, the H.N.B. amp is serial number 00002 (heh), so what do I know. To bring everyone up to speed, I am using rapidograph technical drawing pens, Leroy lettering sets, and good old-fashioned India ink. The chassis has been primed and then painted with a flat white canvas for me to work on.
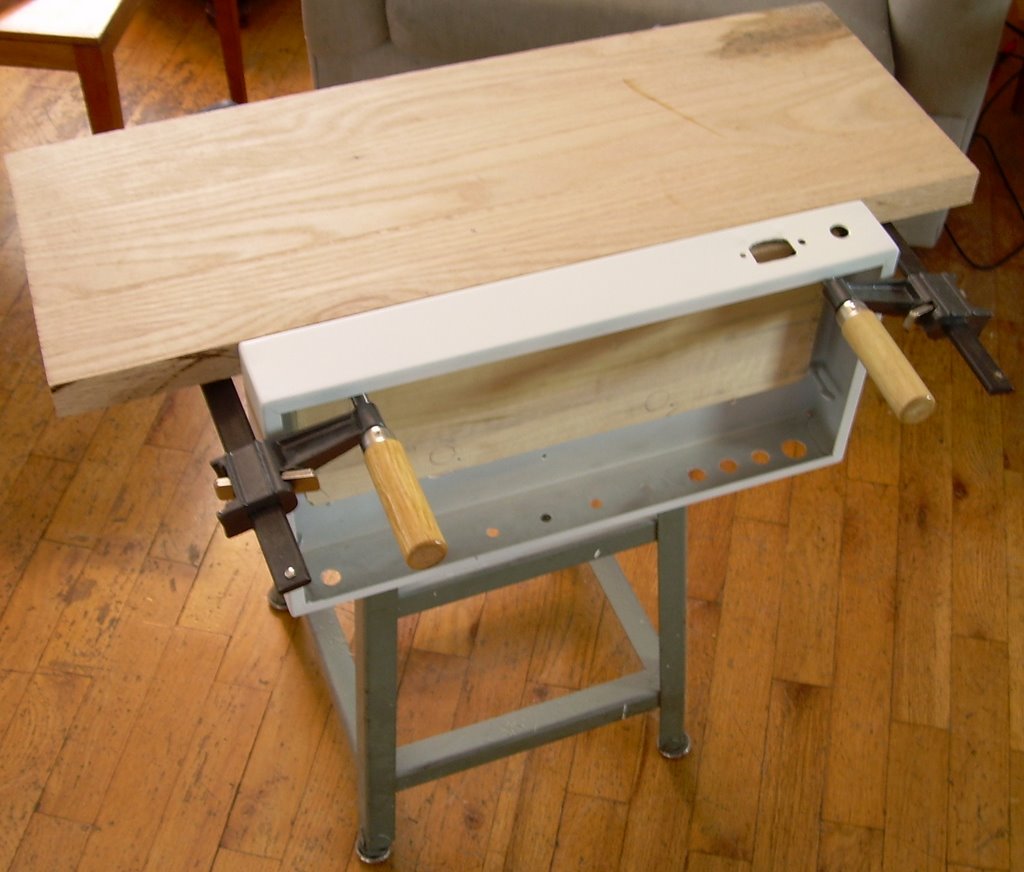 The flat paint is key, if it was too slick (satin, medium glossy), then the pens wouldn't work right on the surface. It feels like a decent polyester film sheet (what you might call Mylar if you worked for DuPont, and you might call it "polyethylene terephthalate polyester film" if you were in my Introduction to Geography class). Here you can see that I am using a stool as a work surface, and a blank of 2" oak to clamp the chassis to. This gives me a little table to work on, so that the lettering system has a stable place to move across.
 I will let you in on a little secret, for the whole words and sentences, I am using a CADLiner 950 autoscriber. This makes things move much faster. However, with 20 years of manual cartographic and cadastral mapping experience, I can do it all with a Leroy set if that was all I had available. Having said this, I do have to use the manual Leroy set for the numbers on the dial. Basically, the first thing I do is cut a template out of a piece of card-stock. The general shape is a dodecagon, or 12-sided polygon. A potentiometer usually sweeps 300 degrees, so I only use 10 vertices. You can barely make out the pencil line on the face of the front here. I need to see the thing, but I also have to erase it later.
 What? Did I really just write erase? Yes, believe it or not, this is the magic of 100% India ink. India ink is a very old technology, but basically it draws on the surface rather than dyeing or coloring the surface. The black carbon sort of sits on top of the surface, and all you need is a nylon eraser and some spit to remove it. If you have ink laid out, and need to erase pencil marks around it, just go lightly and use no moisture at all. This is a very flexible process, even though drawing ink on top of paint sounds more permanent. (This is why I use lacquer at the end, it has to be sealed in.) In this photo, you can see I am laying out the "fives." From this angle, it just looks like I have mad skills for laying things out. Just remember that there is a polygon drawn lightly in pencil, and I am laying the numbers out on 10 little vertex locations based on a template that I created in Adobe Illustrator. You can probably see that template in the lower left of this photo. Note that I have used this before, you can see how I drew Mr. French on my last build (in 3-4 stages).
 In this photo you can see the eraser under my right wrist, and a mechnical pencil under my left. Also, note the card stock template. The template shows me where to put the intersection of the "four" as it lines up with the vertex of the polygon. They all may be off up to a millimeter or so, but it still comes off as passable. Here I have drawn out almost all of the numbers. It might seem frightening, but I have to go in and erase the little pencil marks around the numbers before I am done. You can never tell that some of these numbers were erased and re-drawn. In fact, with 5 controls, I have 50 numbers to place on those dials - and I probably messed up about 5 of them. As long as I am careful about erasing it, you won't see it was ever "moved."
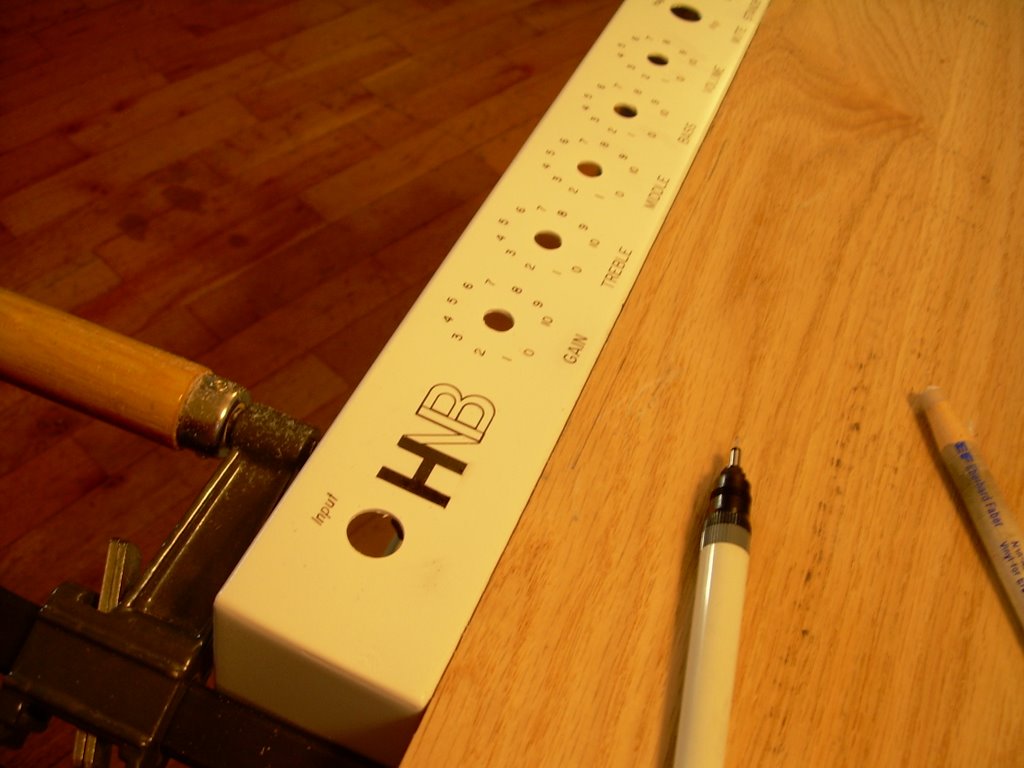 I am almost done with the lettering here. The last thing I did was draw out my father-in-law's initials, just like he signs them. There is a lot of "writing" on this amp, and I even included a hand-drawn partial schematic on the back (just filling in space). You will probably see that later, I hope that was a good idea. Next comes the scary part. To lock everything in, I have to put a clear-coat of lacquer on the surface. But, I also know that moisture is used to erase the ink off of the surface. The first time I did this, I imagined spending a half-hour drawing ink on the chassis, and then watching it melt right off when I spray-painted the wet lacquer over it.
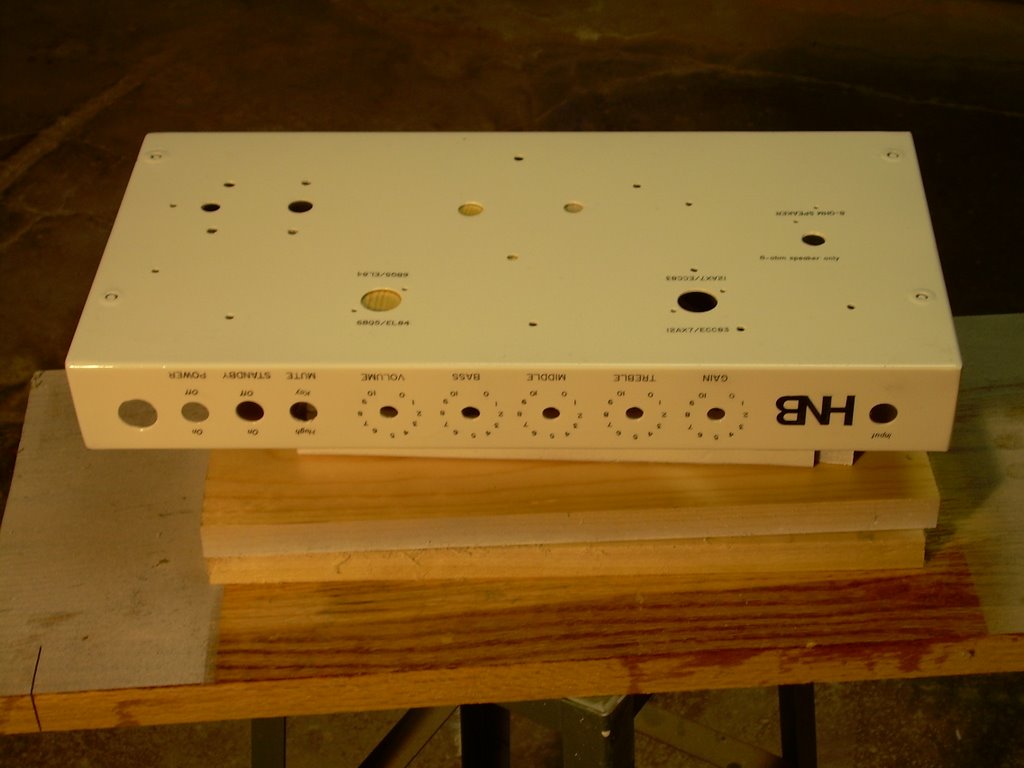 Luckily, the lacquer seems to have the opposite effect. Instead of messing up the lettering, it actually darkens it slightly! If I like the way it looks after applying the ink, then it will look twice as good with the finish coat. I think the lacquer is slightly mixing with the shellac that is found in India ink, and it really brings out the contrast between the white background and black letters.
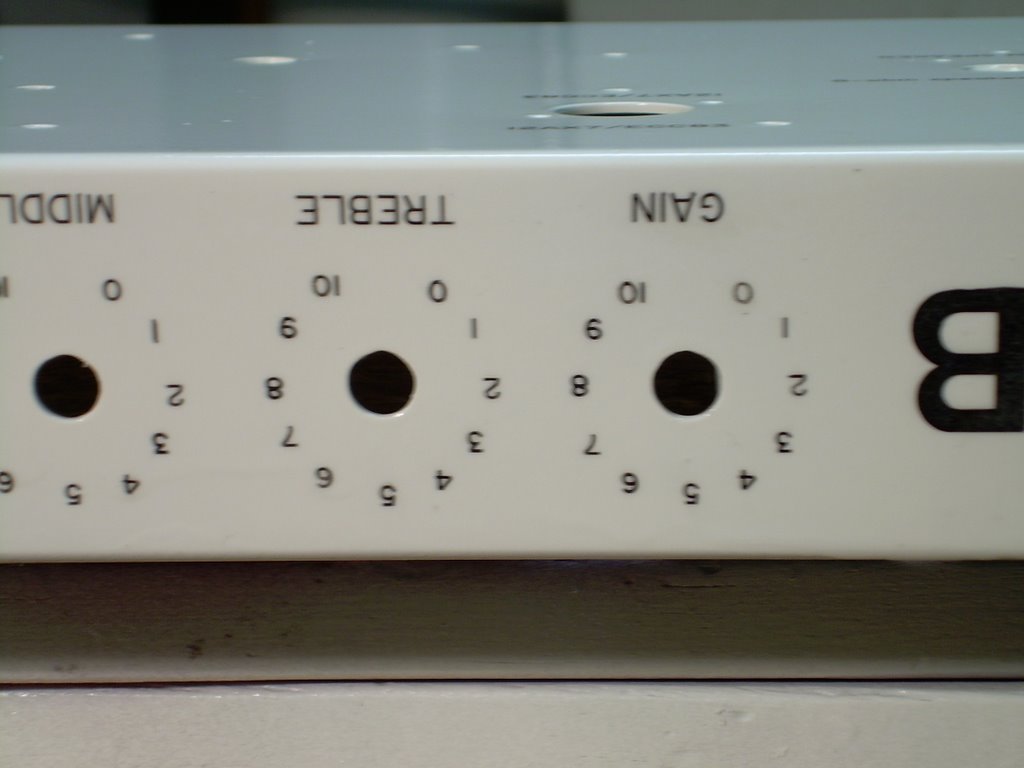 This leaves me with a final product that looks completely original, completely customized, and somewhat professional-ish. The standard "Arial" font that is used in cadastral mapping comes out well for these projects. When I look at it, it just screams to have dimensions, parcel numbers, and acreage calculations on it. One of these days I will create a "Cadastral Mapping" themed amp with north arrows, roads, blocks, lots, etc. That may be a little project that will sit in my office because the next amp I need to build is one that I will play weekly at church. It will not be based on the same schematic as these two, either. I want something like a Fender reverb sound for that.
However, I need to finish my father-in-law's Christmas present. The next step is to wire up the turret board. After that, I will mount the components (transformers, tube sockets, input jacks, potentiometers) on the chassis. Then, all that is needed is the final wiring. All will end with testing, trouble-shooting, and sound checks.
--gh
Sunday, October 15, 2006
Astronomy Schashtronomy
I think I figured out why I don't really care about astronomy. In my family you cannot suggest an axiom or a rule without three reasons, so I guess I will present three reasons why I don't like astronomy. By the way, I will not split hairs with the field of astronomy. Since I know so little, I claim the author's prerogative to lump into astronomy everything from astrophysics, cosmology, quantum physics, etc.
First, astronomers just don't know squat about our universe. I am officially assigning the technical definition of "squat" as 10-9. Astronomy is arguably the oldest accept discipline, and yet they only know one billionth about what goes on outside our world. Oh, and I don't want to hear anything about early astronomy being astrology either. It was an accepted lifestyle for a chosen few to sit out all night somewhere in the Arabian desert and try to understand the movement of those points of light. They may have assigned mystical principles guiding them, but they were still trying to figure out the cycles and patterns of the sun, moon, planets, stars, and occasional comet.
Some try to dismiss early "astronomy" because of it's superstitious roots. In the same breath they may mention how well the ancients could accurately predict solar and lunar eclipses and comets that skip a few generations. Well, you can't have that both ways - it was all a form of astronomy, regardless of the motivation. It took about 2,000 years to predict the patterns of the planets accurately, and then another 1,500 to explain why and how it works. So, astronomy will interest me more when the knowledge rate gets up to a respectable percentage, like 10%. (I think Physics and Chemistry are there. Biology is probably at 5%, and Geology may have reached 20-30%.)
The second reason for disassociating myself from an interest in astronomy is equally unfair. Basically, because astronomers know so little about the universe, theories just seem to come and go like fashion styles. It does not matter how silly it sounds (the universe is made up of little strings right now) - astronomers will defend the currently accepted and applied theories as if they had a total lock on the knowledge. If you don't like String Theory, just wait a few decades and the astronomers will catch up with you. In fact, we really don't even know why gravity works. We know how it works, thanks to a few principles outlined by Newton, Kepler, and others, most of the universe seems to follow along nicely (unless a black hole is involved, which somehow bends or writes its own rules). I do respect that astronomers usually admit when they are wrong (S. Hawking's losing a famous bet recently comes to mind), but their dignity and respect are preserved because the general public does not know the difference between the dismissed theory and its successor.
So, with a few of those bricks soundly planted in the cathedral of knowledge regarding gravity, astronomers are at a loss to explain what keeps the galaxy together. The galaxy should be denser or something, so someone invents dark matter that must be out there throwing the scales off, but keeping things together. I cry foul, but this is a seemingly accepted practice in astronomy. Imagine a molecular biologist trying to explain genetic mutation thus: 'Genes in a cell mutate on a slow but almost predictable rate. Nearly 99.99999% of the time, the Doosies and the Launchies say "NO" to mutation. However, once every 100,000 cell divisions, the Doosies and the Launchies say "YES" and the genes mutate.'
Third, and finally, I dislike the field because of our fixed perspective. Now, I admit that this is totally unfair, but astronomy will be more interesting when we can see the universe, or even our galaxy, from a different location. Imagine that we are in a cell of a human body, somewhere around the elbow. It takes a while to recognize that there are other cells, and then a theory comes along to suggest that we are on the wing of a collective "body" of cells. Later, someone notices that if we look outside of our "body," we can even see other human bodies walking around. Every picture of the human body is seen through a perspective of looking along the arm and around organs in the chest cavity, etc. You can see how difficult it is for astronomers, and they have done a phenomenal job with what they have. But, give them a spaceship that travels at hyper-light speeds and give us a picture of our galaxy from another angle! We think we know what parts of our galaxy look like, but they are ALL from a tiny point.
As you can see, my objections are really not fair. I don't begrudge astronomers and their currently published theories mostly because they know they have very little of the knowledge down. An astronomer who claims to know how the universe works is probably a shaman, and not an astronomer at all.
My last observation did not need to make my "three reasons" clause, but may be worth noting. Something that really tickles me about this field is the divergent mix of both left- and right-brained people. Maybe the right-brainers are held captive by the limited knowledge and react by calling items "red giants" and "white dwarfs." The left-brain inventory of astronomical designations like M275 and NGC2863 causes the right-brain brethren in the field to suggest names like "horse-head nebula" and "running man nebula." Oh, and then we had that whole "eye of god" image that went around the web a few years back - but I will not blame this on astronomy.
--gh
First, astronomers just don't know squat about our universe. I am officially assigning the technical definition of "squat" as 10-9. Astronomy is arguably the oldest accept discipline, and yet they only know one billionth about what goes on outside our world. Oh, and I don't want to hear anything about early astronomy being astrology either. It was an accepted lifestyle for a chosen few to sit out all night somewhere in the Arabian desert and try to understand the movement of those points of light. They may have assigned mystical principles guiding them, but they were still trying to figure out the cycles and patterns of the sun, moon, planets, stars, and occasional comet.
Some try to dismiss early "astronomy" because of it's superstitious roots. In the same breath they may mention how well the ancients could accurately predict solar and lunar eclipses and comets that skip a few generations. Well, you can't have that both ways - it was all a form of astronomy, regardless of the motivation. It took about 2,000 years to predict the patterns of the planets accurately, and then another 1,500 to explain why and how it works. So, astronomy will interest me more when the knowledge rate gets up to a respectable percentage, like 10%. (I think Physics and Chemistry are there. Biology is probably at 5%, and Geology may have reached 20-30%.)
The second reason for disassociating myself from an interest in astronomy is equally unfair. Basically, because astronomers know so little about the universe, theories just seem to come and go like fashion styles. It does not matter how silly it sounds (the universe is made up of little strings right now) - astronomers will defend the currently accepted and applied theories as if they had a total lock on the knowledge. If you don't like String Theory, just wait a few decades and the astronomers will catch up with you. In fact, we really don't even know why gravity works. We know how it works, thanks to a few principles outlined by Newton, Kepler, and others, most of the universe seems to follow along nicely (unless a black hole is involved, which somehow bends or writes its own rules). I do respect that astronomers usually admit when they are wrong (S. Hawking's losing a famous bet recently comes to mind), but their dignity and respect are preserved because the general public does not know the difference between the dismissed theory and its successor.
So, with a few of those bricks soundly planted in the cathedral of knowledge regarding gravity, astronomers are at a loss to explain what keeps the galaxy together. The galaxy should be denser or something, so someone invents dark matter that must be out there throwing the scales off, but keeping things together. I cry foul, but this is a seemingly accepted practice in astronomy. Imagine a molecular biologist trying to explain genetic mutation thus: 'Genes in a cell mutate on a slow but almost predictable rate. Nearly 99.99999% of the time, the Doosies and the Launchies say "NO" to mutation. However, once every 100,000 cell divisions, the Doosies and the Launchies say "YES" and the genes mutate.'
Third, and finally, I dislike the field because of our fixed perspective. Now, I admit that this is totally unfair, but astronomy will be more interesting when we can see the universe, or even our galaxy, from a different location. Imagine that we are in a cell of a human body, somewhere around the elbow. It takes a while to recognize that there are other cells, and then a theory comes along to suggest that we are on the wing of a collective "body" of cells. Later, someone notices that if we look outside of our "body," we can even see other human bodies walking around. Every picture of the human body is seen through a perspective of looking along the arm and around organs in the chest cavity, etc. You can see how difficult it is for astronomers, and they have done a phenomenal job with what they have. But, give them a spaceship that travels at hyper-light speeds and give us a picture of our galaxy from another angle! We think we know what parts of our galaxy look like, but they are ALL from a tiny point.
As you can see, my objections are really not fair. I don't begrudge astronomers and their currently published theories mostly because they know they have very little of the knowledge down. An astronomer who claims to know how the universe works is probably a shaman, and not an astronomer at all.
My last observation did not need to make my "three reasons" clause, but may be worth noting. Something that really tickles me about this field is the divergent mix of both left- and right-brained people. Maybe the right-brainers are held captive by the limited knowledge and react by calling items "red giants" and "white dwarfs." The left-brain inventory of astronomical designations like M275 and NGC2863 causes the right-brain brethren in the field to suggest names like "horse-head nebula" and "running man nebula." Oh, and then we had that whole "eye of god" image that went around the web a few years back - but I will not blame this on astronomy.
--gh
Subscribe to:
Posts (Atom)